A Minimalist End-to-End Scrapy Tutorial
This tutorial series was first published on Medium. I combine 5 parts into this long post for people who cannot access Medium.
Part I
Web scraping is an important skill for data scientists. I have developed a number of ad hoc web scraping projects using Python, BeautifulSoup, and Scrapy in the past few years and read a few books and tons of online tutorials along the way. However, I have not found a simple beginner level tutorial that is end-to-end in the sense that covers all basic steps and concepts in a typical Scrapy web scraping project (therefore Minimalist in the title) - that’s why I am writing this and hope the code repo can serve as a template to help jumpstart your web scraping projects.
Many people ask: should I use BeautifulSoup or Scrapy? They are different things: BeautifulSoup is a library for parsing HTML and XML and Scrapy is a web scraping framework. You can use BeautifulSoup instead of Scrapy build-in selectors if you want but comparing BeautifulSoup to Scrapy is like comparing the Mac keyboard to the iMac or a better metaphor as stated in the official documentation “like comparing jinja2 to Django” if you know what they are :) - In short, you should learn Scrapy if you want to do serious and systematic web scraping.
TL;DR, show me the code:
In this tutorial series, I am going to cover the following steps:
- Start a Scrapy project from scratch and develop a simple spider. One important thing is the use of Scrapy Shell for analyzing pages and debugging, which is one of the main reasons you should use Scrapy over BeautifulSoup.
- Introduce Item and ItemLoader and explain why you want to use them (although they make your code seem more complicated at first).
- Store the data to the database using ORM (SQLAlchemy) via Pipelines and show how to set up the most common One-to-Many and Many-to-Many relationships.
- Deploy the project to Scrapinghub (you have to pay for service such as scheduled crawling jobs) or set up your own servers completely free of charge by using the great open source project ScrapydWeb and Heroku.
- I created a separate repo (Scrapy + Selenium) to show how to crawl dynamic web pages (such as a page that loads additional content via scrolling) and how to use proxy networks (ProxyMesh) to avoid getting banned.
Some prerequisites:
- Basic knowledge on Python (Python 3 for this tutorial), virtual environment, Homebrew, etc., see my other article for how to set up the environment: How to Setup Mac for Python Development
- Basic knowledge of Git and Github. I recommend the Pro Git book.
- Basic knowledge of database and ORM, e.g., Introduction to Structured Query Language (SQL).
Let’s get started! First, create a new folder, setup Python 3 virtual environment inside the folder, and install Scrapy. To make this step easy, I created a starter repo, which you can fork and clone (see Python3 virtual environment documentation if needed):
$ git clone https://github.com/yourusername/scrapy-tutorial-starter.git
$ cd scrapy-tutorial-starter
$ python3.6 -m venv venv
$ source venv/bin/activate
$ pip install -r requirements.txt
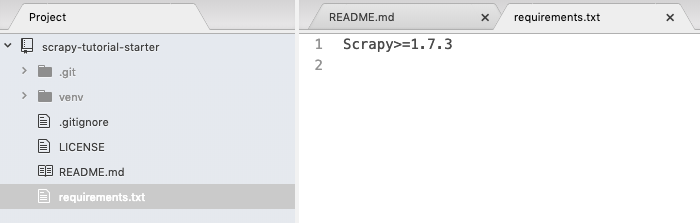
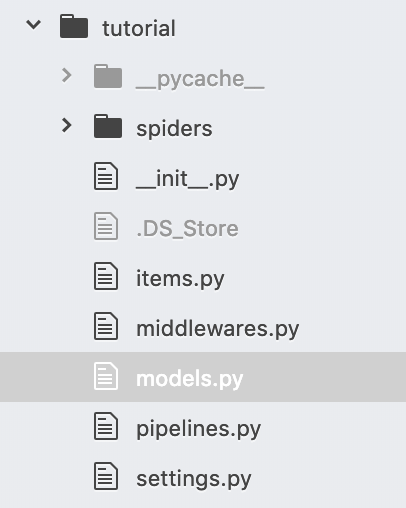
Your folder should look like the following and I assume we always work in the virtual environment. Note that we only have one package in the requirements.txt so far.
run scrapy startproject tutorial to create an empty scrapy project and your folder looks like:

Two identical “tutorial” folders were created. We don’t need the first level “tutorial” folder — delete it and move the second level “tutorial” folder with its contents one-level up — I know this is confusing but that’s all you have to do with the folder structure. Now, your folder should look like:

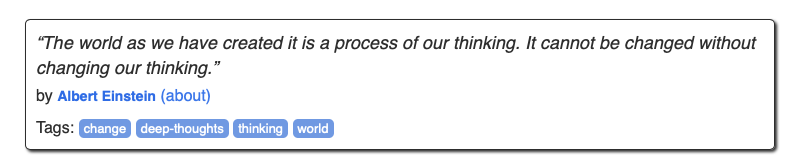
Don’t worry about the auto-generated files so far, we will come back to those files later. This tutorial is based on the official Scrapy tutorial. Therefore, the website we are going to crawl is http://quotes.toscrape.com, which is quite simple: there are pages of quotes with authors and tags:
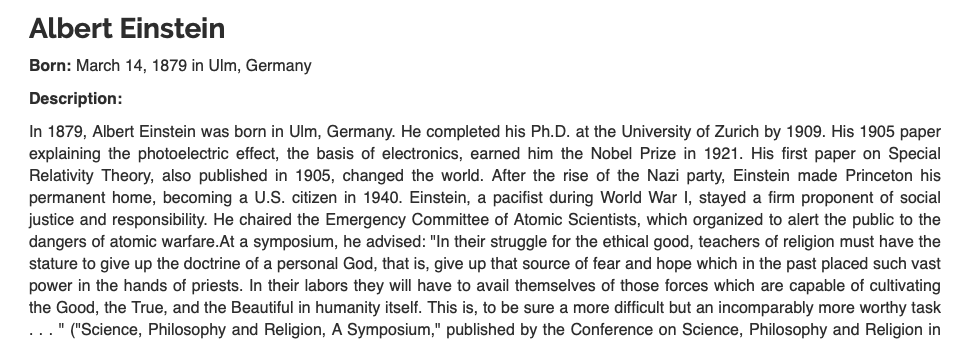
When you click the author, it goes to the author detail page with name, birthday, and bio:
Now, create a new file named “quotes-spider.py” in the “spider” folder with the following content:
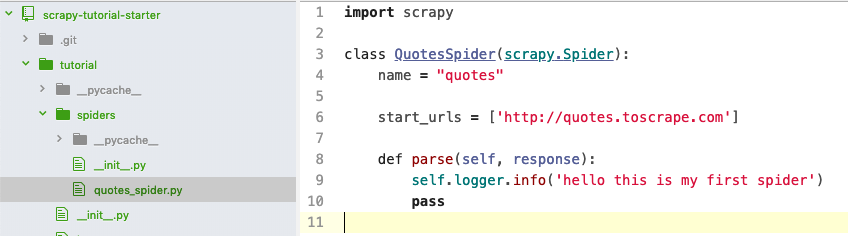
You just created a spider named “quotes”, which sends a request to http://quotes.toscrape.com and gets the response from the server. However, the spider does not do anything so far when parsing the response and simply outputs a string to the console. Let’s run this spider: scrapy crawl quotes , you should see the output like:

Next, let’s analyze the response, i.e., the HTML page at http://quotes.toscrape.com using Scrapy Shell by running:
$ scrapy shell http://quotes.toscrape.com/
...
2019-08-21 20:10:40 [scrapy.core.engine] INFO: Spider opened
2019-08-21 20:10:41 [scrapy.core.engine] DEBUG: Crawled (404) <GET http://quotes.toscrape.com/robots.txt> (referer: None)
2019-08-21 20:10:41 [scrapy.core.engine] DEBUG: Crawled (200) <GET http://quotes.toscrape.com/> (referer: None)
[s] Available Scrapy objects:
[s]   scrapy     scrapy module (contains scrapy.Request, scrapy.Selector, etc)
[s]   crawler    <scrapy.crawler.Crawler object at 0x105d01dd8>
[s]   item       {}
[s]   request    <GET http://quotes.toscrape.com/>
[s]   response   <200 http://quotes.toscrape.com/>
[s]   settings   <scrapy.settings.Settings object at 0x106ae34e0>
[s]   spider     <DefaultSpider 'default' at 0x106f13780>
[s] Useful shortcuts:
[s]   fetch(url[, redirect=True]) Fetch URL and update local objects (by default, redirects are followed)
[s]   fetch(req)                  Fetch a scrapy.Request and update local objects
[s]   shelp()           Shell help (print this help)
[s]   view(response)    View response in a browser
>>>
You can select elements using either Xpath selector or CSS selector and Chrome DevTools is often used to analyze the page (we won’t cover the selector details, please read the documents to learn how to use them):

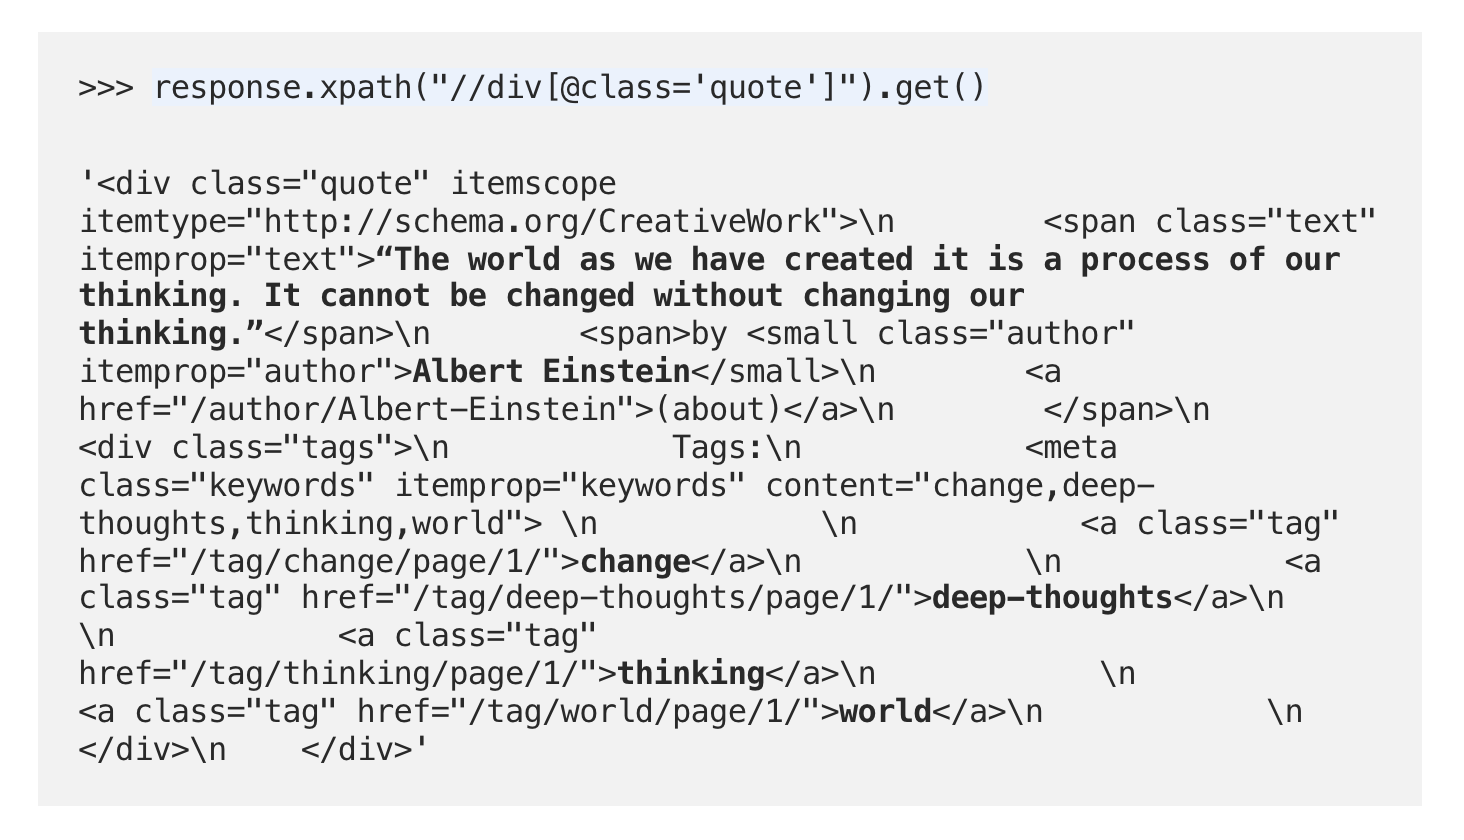
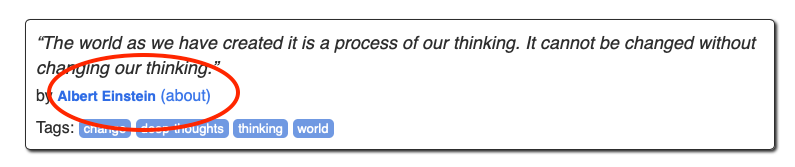
For example, you can test the selector and see the results in Scrapy Shell — assume we want to get the quote block shown above. You can either use Xpath response.xpath(“//div[@class=’quote’]”).get() (.get() shows the first selected element, use .getall() to show all) or CSSresponse.css(“div .quote”).get() . I bolded the quote text, author, and tags we want to get from this quote block: response.xpath("//div[@class='quote']").get()
We can proceed in the shell to get the data as follows:
- get all quote blocks into “quotes”
- use the first quote in “quotes”:
quotes[0] - try the css selectors
>>> quotes = response.xpath("//div[@class='quote']")
>>> quotes[0].css(".text::text").getall()
['“The world as we have created it is a process of our thinking. It cannot be changed without changing our thinking.”']
>>> quotes[0].css(".author::text").getall()
['Albert Einstein']
>>> quotes[0].css(".tag::text").getall()
['change', 'deep-thoughts', 'thinking', 'world']
It seems that the selectors shown above get what we need. Note that I am mixing Xpath and CSS selectors for the demonstration purpose here — no need to use both in this tutorial. Now, let’s revise the spider file and use keyword yield to output the selected data to the console (note that each page has many quotes and we use a loop to go over all of them):
import scrapy
class QuotesSpider(scrapy.Spider):
    name = "quotes"
start_urls = ['http://quotes.toscrape.com']
def parse(self, response):
        self.logger.info('hello this is my first spider')
        quotes = response.css('div.quote')
        for quote in quotes:
            yield {
                'text': quote.css('.text::text').get(),
                'author': quote.css('.author::text').get(),
                'tags': quote.css('.tag::text').getall(),
            }
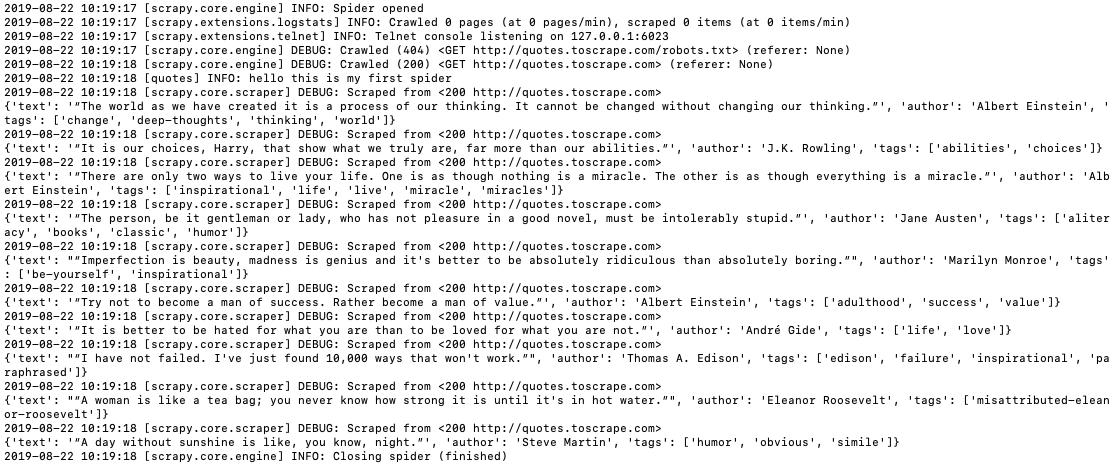
Run the spider again: scrapy crawl quotes and you can see the extracted data in the log:
You can save the data in a JSON file by running: scrapy crawl quotes -o quotes.json
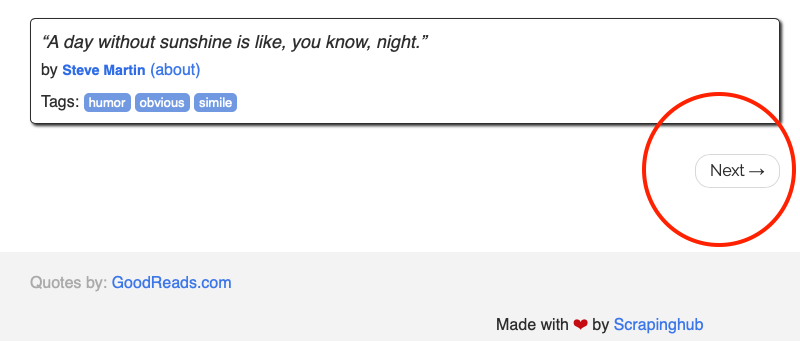
So far, we get all quote information from the first page, and our next task is to crawl all pages. You should notice a “Next” button at the bottom of the front page for page navigation — the logic is: click the Next button to go to the next page, get the quotes, click Next again till the last page without the Next button.
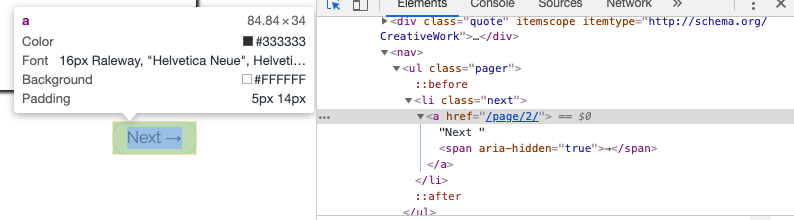
Via Chrome DevTools, we can get the URL of the next page:
Let’s test it out in Scrapy Shell by running scrapy shell http://quotes.toscrape.com/ again:
$ scrapy shell http://quotes.toscrape.com/
...
>>> response.css('li.next a::attr(href)').get()
'/page/2/'
Now we can write the following code for the spider to go over all pages to get all quotes:
import scrapy

class QuotesSpider(scrapy.Spider):
    name = "quotes"

    start_urls = ['http://quotes.toscrape.com']

    def parse(self, response):
        self.logger.info('hello this is my first spider')
        quotes = response.css('div.quote')
        for quote in quotes:
            yield {
                'text': quote.css('.text::text').get(),
                'author': quote.css('.author::text').get(),
                'tags': quote.css('.tag::text').getall(),
            }

        next_page = response.css('li.next a::attr(href)').get()

        if next_page is not None:
            next_page = response.urljoin(next_page)
            yield scrapy.Request(next_page, callback=self.parse)
next_page = response.urljoin(next_page) gets the full URL and yield scrapy.Request(next_page, callback=self.parse) sends a new request to get the next page and use a callback function to call the same parse function to get the quotes from the new page.
Shortcuts can be used to further simplify the code above: see this section. Essentially, response.follow supports relative URLs (no need to call urljoin) and automatically uses the href attribute for <a>. So, the code can be shortened further:
for a in response.css('li.next a'):
            yield response.follow(a, callback=self.parse)
Now, run the spider again scrapy crawl quotes you should see quotes from all 10 pages have been extracted. Hang in there — we are almost done for this first part. The next task is to crawl the individual author’s page.
As shown above, when we process each quote, we can go to the individual author’s page by following the highlighted link — let’s use Scrapy Shell to get the link:
$ scrapy shell http://quotes.toscrape.com/
...
>>> response.css('.author + a::attr(href)').get()
'/author/Albert-Einstein'
So, during the loop of extracting each quote, we issue another request to go to the corresponding author’s page and create another parse_author function to extract the author’s name, birthday, born location and bio and output to the console. The updated spider looks like the following:
import scrapy

class QuotesSpider(scrapy.Spider):
    name = "quotes"

    start_urls = ['http://quotes.toscrape.com']

    def parse(self, response):
        # self.logger.info('hello this is my first spider')
        quotes = response.css('div.quote')
        for quote in quotes:

            yield {
                'text': quote.css('.text::text').get(),
                'author': quote.css('.author::text').get(),
                'tags': quote.css('.tag::text').getall(),
            }

            author_url = quote.css('.author + a::attr(href)').get()
            self.logger.info('get author page url')
            # go to the author page
            yield response.follow(author_url, callback=self.parse_author)

        for a in response.css('li.next a'):
            yield response.follow(a, callback=self.parse)


    def parse_author(self, response):
        yield {
            'author_name': response.css('.author-title::text').get(),
            'author_birthday': response.css('.author-born-date::text').get(),
            'author_bornlocation': response.css('.author-born-location::text').get(),
            'author_bio': response.css('.author-description::text').get(),
        }
Run the spider again scrapy crawl quotes and double-check that everything you need to extract is output to the console correctly. Note that Scrapy is based on Twisted, a popular event-driven networking framework for Python and thus is asynchronous. This means that the individual author page may not be processed in sync with the corresponding quote, e.g., the order of the author page results may not match the quote order on the page. We will discuss how to link the quote with its corresponding author page in the later part.
Congratulations, you have finished Part I of this tutorial.
Learn more about Item and ItemLoader in Part II.
Part II
In Part I, you learned how to setup Scrapy project and write a basic spider to extract web pages by following page navigation links. However, the extracted data are merely displayed to the console. In Part II, I will introduce the concepts of Item and ItemLoader and explain why you should use them to store the extracted data.
Let’s first look at Scrapy Architecture:
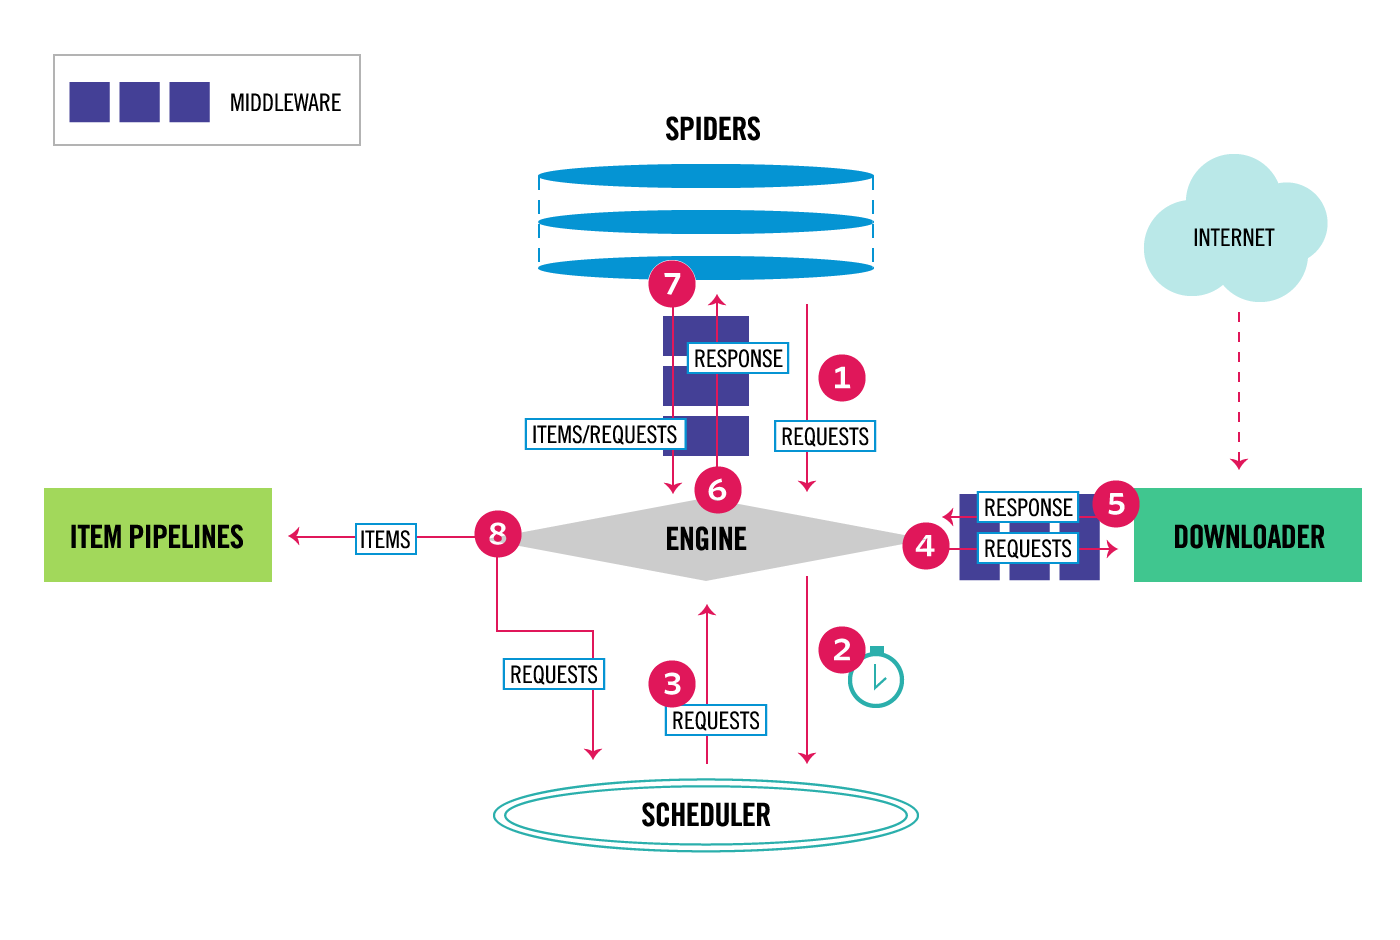
As you can see in step 7, and 8, Scrapy is designed around the concept of Item, i.e., the spider will parse the extracted data into Items and then the Items will go through Item Pipelines for further processing. I summarize some key reasons to use Item:
-
Scrapy is designed around Item and expect Items as outputs from the spider — you will see in Part IV that when you deploy the project to ScrapingHub or similar services, there are default UIs for you to browse Items and related statistics.
-
Items clearly define the common output data format in a separate file, which enables you to quickly check what structured data you are collecting and prompts exceptions when you mistakenly create inconsistent data, such as by mis-spelling field names in your code — this happens more often than you think :).
-
You can add pre/post processing to each Item field (via ItemLoader), such as trimming spaces, removing special characters, etc., and separate this processing code from the main spider logic to keep your code structured and clean.
-
In Part III, you will learn how to add different item pipelines to do things like detecting duplicate items and saving items to the database.
At the end of Part I, our spider yields the following data:
yield {
                'text': quote.css('.text::text').get(),
                'author': quote.css('.author::text').get(),
                'tags': quote.css('.tag::text').getall(),
            }
and
yield {
            'author_name': response.css('.author-title::text').get(),
            'author_birthday': response.css('.author-born-date::text').get(),
            'author_bornlocation': response.css('.author-born-location::text').get(),
            'author_bio': response.css('.author-description::text').get(),
        }
You may notice that author and author_name are the same thing (one is from the quote page, one is from the corresponding individual author page). So, we actually extract 6 pieces of data, i.e., quote text, tags, author name, birthday, born location, and bio. Now, let’s define the Item to hold those data.
Open the auto-generated items.py file and update its content as follows:
from scrapy.item import Item, Field


class QuoteItem(Item):
    quote_content = Field()
    tags = Field()
    author_name = Field()
    author_birthday = Field()
    author_bornlocation = Field()
    author_bio = Field()
We just define one Scrapy item named “QuoteItem” with 6 fields to store the extracted data. Here, if you designed a relational database before, you may ask: should I have two items QuoteItem and AuthorItem to better represent the data logically? The answer is yes you could but not recommended in this case because items are returned by Scrapy in an asynchronous way and you will have additional logic added to match the quote item with its corresponding item — it’s much easier to put the related quote and author in one item in this case.
Now, you can put the extracted data into Item in the spider file like:
from tutorial.items import QuoteItem
...
quote_item = QuoteItem()
...
for quote in quotes:
    quote_item['quote_content'] = quote.css('.text::text').get()
    quote_item['tags'] = quote.css('.tag::text').getall()
Or a preferred way is to use ItemLoader as follows:
from scrapy.loader import ItemLoader
from tutorial.items import QuoteItem
...

for quote in quotes:
    loader = ItemLoader(item=QuoteItem(), selector=quote)
    loader.add_css('quote_content', '.text::text')
    loader.add_css('tags', '.tag::text')
    quote_item = loader.load_item()
Hmm, the code with ItemLoader seems more complicated — why do you want to do that? The quick answer is: the raw data you get from the css selector may need to be further parsed. For example, the extracted quote_content has quotation marks in Unicode that needs to be removed.

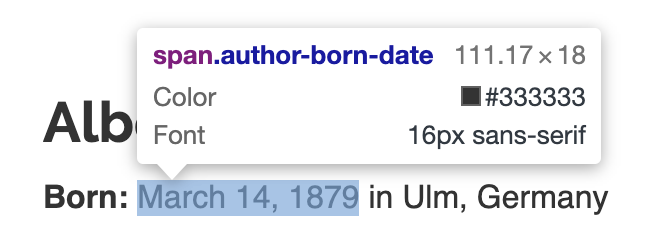
The birthday is a string and needs to be parsed into Python date format:
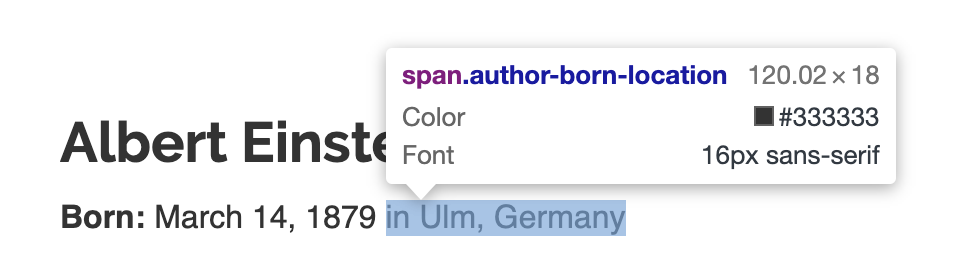
The born location has “in” in the extracted string that needs to be removed:
ItemLoader enables pre/post processing functions to be nicely specified away from the spider code and each field of the Item can have different sets of pre/post processing functions for better code reuse.
For example, we can create a function to remove the Unicode quotation marks aforementioned as follows:
from scrapy.item import Item, Field
from scrapy.loader.processors import MapCompose

def remove_quotes(text):
    # strip the unicode quotes
    text = text.strip(u'\u201c'u'\u201d')
    return text

class QuoteItem(Item):
    quote_content = Field(
        input_processor=MapCompose(remove_quotes)
        )
    tags = Field()
    author_name = Field()
    author_birthday = Field()
    author_bornlocation = Field()
    author_bio = Field()
MapCompose enables us to apply multiple processing functions to a field (we only have one in this example). ItemLoader returns a list, such as [‘death’, ‘life’] for tags. For author name, although there is one value a list is returned such as [‘Jimi Hendrix’], TakeFirst processor takes the first value of the list. After adding additional processors, items.py looks like:
from scrapy.item import Item, Field
from scrapy.loader.processors import MapCompose, TakeFirst
from datetime import datetime


def remove_quotes(text):
    # strip the unicode quotes
    text = text.strip(u'\u201c'u'\u201d')
    return text


def convert_date(text):
    # convert string March 14, 1879 to Python date
    return datetime.strptime(text, '%B %d, %Y')


def parse_location(text):
    # parse location "in Ulm, Germany"
    # this simply remove "in ", you can further parse city, state, country, etc.
    return text[3:]


class QuoteItem(Item):
    quote_content = Field(
        input_processor=MapCompose(remove_quotes),
        # TakeFirst return the first value not the whole list
        output_processor=TakeFirst()
        )
    author_name = Field(
        input_processor=MapCompose(str.strip),
        output_processor=TakeFirst()
        )
    author_birthday = Field(
        input_processor=MapCompose(convert_date),
        output_processor=TakeFirst()
    )
    author_bornlocation = Field(
        input_processor=MapCompose(parse_location),
        output_processor=TakeFirst()
    )
    author_bio = Field(
        input_processor=MapCompose(str.strip),
        output_processor=TakeFirst()
        )
    tags = Field()
The key issue right now is that we load two fields quote_content and tags from the quote page and then issue another request to get the corresponding author page to load author_name, author_birthday, author_bornlocation, and bio. To do this, we need to pass the item quote_item from one page to another as metadata as follows:
yield response.follow(author_url, self.parse_author, meta={'quote_item': quote_item})
And in the author parsing function, you can get the item:
def parse_author(self, response):
        quote_item = response.meta['quote_item']
Now, after adding Item and ItemLoader, our spider file looks like:
import scrapy
from scrapy.loader import ItemLoader
from tutorial.items import QuoteItem

class QuotesSpider(scrapy.Spider):
    name = "quotes"
    allowed_domains = ["toscrape.com"]
    start_urls = ['http://quotes.toscrape.com/']


    def parse(self, response):
        self.logger.info('Parse function called on {}'.format(response.url))
        # quotes = response.xpath("//div[@class='quote']")
        quotes = response.css('div.quote')

        for quote in quotes:
            loader = ItemLoader(item=QuoteItem(), selector=quote)
            # pay attention to the dot .// to use relative xpath
            # loader.add_xpath('quote_content', ".//span[@class='text']/text()")
            loader.add_css('quote_content', '.text::text')
            # loader.add_xpath('author', './/small//text()')
            loader.add_css('tags', '.tag::text')
            quote_item = loader.load_item()
            author_url = quote.css('.author + a::attr(href)').get()
            # go to the author page and pass the current collected quote info
            yield response.follow(author_url, self.parse_author, meta={'quote_item': quote_item})

        # go to Next page
        for a in response.css('li.next a'):
            yield response.follow(a, self.parse)

    def parse_author(self, response):
        quote_item = response.meta['quote_item']
        loader = ItemLoader(item=quote_item, response=response)
        loader.add_css('author_name', '.author-title::text')
        loader.add_css('author_birthday', '.author-born-date::text')
        loader.add_css('author_bornlocation', '.author-born-location::text')
        loader.add_css('author_bio', '.author-description::text')
        yield loader.load_item()
Run the spider scrapy crawl quotes in the console Scrapy stats, you can find the total number of items extracted:
2019-09-11 09:49:36 [scrapy.statscollectors] INFO: Dumping Scrapy stats:
...
'downloader/request_count': 111,
...
'item_scraped_count': 50,
Congrats! you have finished Part II of this tutorial.
Part III
In Part II, you have extracted all the required data from the website and stored them in Items. In Part III, I will introduce Item Pipelines to save the extracted data into a database using ORM (SQLAlchemy) and handle the duplicate data issue.
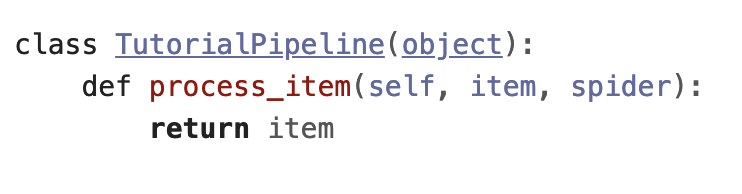
Each item returned by the spider is sent to Item Pipelines (if any) sequentially for additional processing, such as saving items to the database, data validation, removing duplicates, etc. Item pipelines are defined as classes in the pipelines.py file, open this autogenerated file, you can see one empty pipeline has been defined named “TutorialPipeline”:
You need to specify which pipeline is enabled and the sequence of pipelines in settings.py file — by default, no pipeline is enabled. To enable the empty pipeline above, comment out the following part in settings.py:
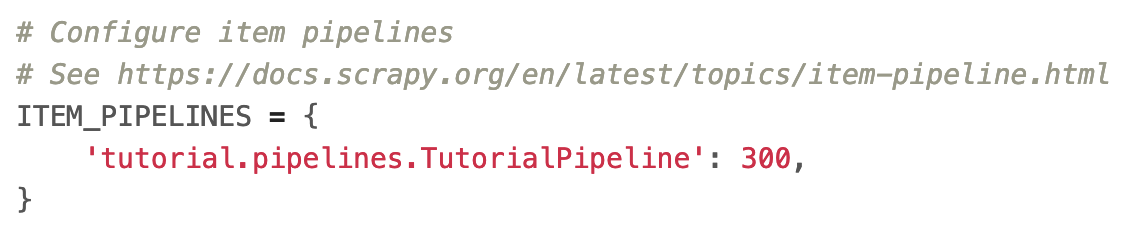
The integer values (normally ranging from 0 to 1000), such as 300 as shown above, determine the execution order of the pipelines (lower valued pipeline runs first).
Next, let’s develop a pipeline to save the items to a database. Here, I use Object-Relational Mapping (ORM) to query and manipulate data from the database using the object-oriented paradigm. In particular, I use SQLAlchemy. I won’t cover the details of ORM and please refer to this article for some Pros and Cons.
First, let’s design the database schema. Note that there are 6 fields in the item, e.g., quote_content, tags, author_name, author_birthday, author_bornlocation, and bio. I am going to use three tables to store these data, i.e., quote, tag, author. There is a many-to-many relationship between quote and tag (one quote can one or more tags and one tag can associate with one or more quotes) and a one-to-many relationship between author and quote (one author can have one or more quotes but one quote belongs to only one author).
To define this schema using ORM via SQLAlchemy, you need to:
- add
SQLAlchemy>=1.3.6inrequirements.txtand install the package via runningpip install -r requirements.txtin the virtual environment - create a models.py with the following content:
from sqlalchemy import create_engine, Column, Table, ForeignKey, MetaData
from sqlalchemy.orm import relationship
from sqlalchemy.ext.declarative import declarative_base
from sqlalchemy import (
    Integer, String, Date, DateTime, Float, Boolean, Text)
from scrapy.utils.project import get_project_settings

Base = declarative_base()


def db_connect():
    """
    Performs database connection using database settings from settings.py.
    Returns sqlalchemy engine instance
    """
    return create_engine(get_project_settings().get("CONNECTION_STRING"))


def create_table(engine):
    Base.metadata.create_all(engine)


# Association Table for Many-to-Many relationship between Quote and Tag
# https://docs.sqlalchemy.org/en/13/orm/basic_relationships.html#many-to-many
quote_tag = Table('quote_tag', Base.metadata,
    Column('quote_id', Integer, ForeignKey('quote.id')),
    Column('tag_id', Integer, ForeignKey('tag.id'))
)


class Quote(Base):
    __tablename__ = "quote"

    id = Column(Integer, primary_key=True)
    quote_content = Column('quote_content', Text())
    author_id = Column(Integer, ForeignKey('author.id'))  # Many quotes to one author
    tags = relationship('Tag', secondary='quote_tag',
        lazy='dynamic', backref="quote")  # M-to-M for quote and tag


class Author(Base):
    __tablename__ = "author"

    id = Column(Integer, primary_key=True)
    name = Column('name', String(50), unique=True)
    birthday = Column('birthday', DateTime)
    bornlocation = Column('bornlocation', String(150))
    bio = Column('bio', Text())
    quotes = relationship('Quote', backref='author')  # One author to many Quotes


class Tag(Base):
    __tablename__ = "tag"

    id = Column(Integer, primary_key=True)
    name = Column('name', String(30), unique=True)
    quotes = relationship('Quote', secondary='quote_tag',
        lazy='dynamic', backref="tag")  # M-to-M for quote and tag
db_connect() function use create_engine(get_project_settings().get(“CONNECTION_STRING”)) to connect to a database. CONNECTION_STRING is specified in settings.py file. You can change the connection string to connect to different database systems, such as SQLite, MySQL, Postgres without changing your code. In this tutorial, I use SQLite, which essentially is a local file named scrapy_quotes.db created in the root folder when the first time the spider runs: CONNECTION_STRING = ‘sqlite:///scrapy_quotes.db’
I also provide an example to connect to MySQL (commented out):
# MySQL
CONNECTION_STRING = "{drivername}://{user}:{passwd}@{host}:{port}/{db_name}?charset=utf8".format(
     drivername="mysql",
     user="harrywang",
     passwd="tutorial",
     host="localhost",
     port="3306",
     db_name="scrapy_quotes",
)
Now, let’s create the pipeline to save items to the database. Open pipelines.py file and add the following class (pipeline):
class SaveQuotesPipeline(object):
def __init__(self):
"""
Initializes database connection and sessionmaker
Creates tables
"""
engine = db_connect()
create_table(engine)
self.Session = sessionmaker(bind=engine)
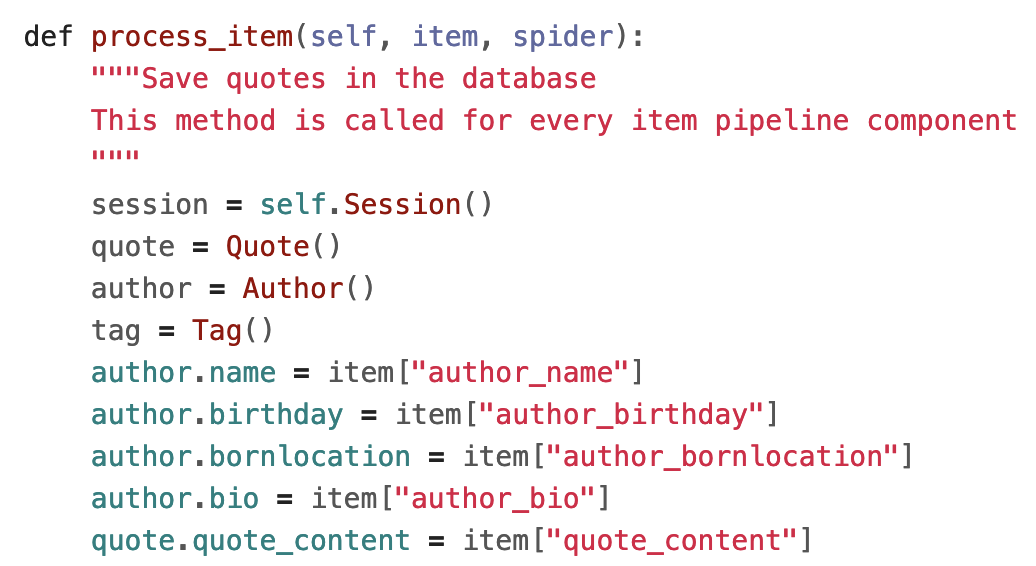
def process_item(self, item, spider):
"""Save quotes in the database
This method is called for every item pipeline component
"""
session = self.Session()
quote = Quote()
author = Author()
tag = Tag()
author.name = item["author_name"]
author.birthday = item["author_birthday"]
author.bornlocation = item["author_bornlocation"]
author.bio = item["author_bio"]
quote.quote_content = item["quote_content"]
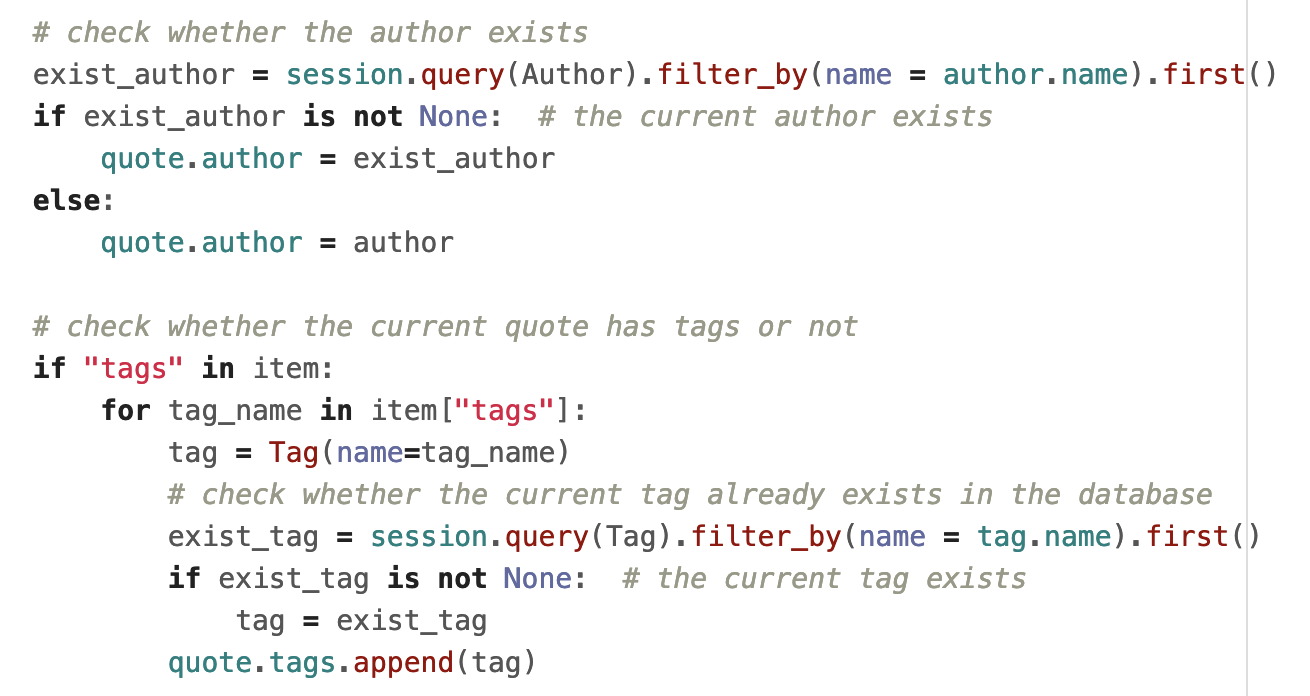
# check whether the author exists
exist_author = session.query(Author).filter_by(name = author.name).first()
if exist_author is not None: # the current author exists
quote.author = exist_author
else:
quote.author = author
# check whether the current quote has tags or not
if "tags" in item:
for tag_name in item["tags"]:
tag = Tag(name=tag_name)
# check whether the current tag already exists in the database
exist_tag = session.query(Tag).filter_by(name = tag.name).first()
if exist_tag is not None: # the current tag exists
tag = exist_tag
quote.tags.append(tag)
try:
session.add(quote)
session.commit()
except:
session.rollback()
raise
finally:
session.close()
return item
Make sure you also import the required packages and functions:

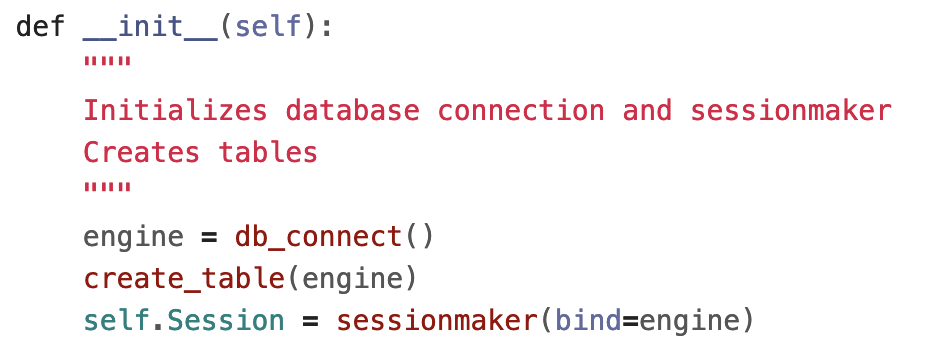
The init function below uses the functions in models.py to connect to the database (db_connect) and create tables (create_table) if not existed yet (otherwise ignored).
in process_item function, I first create instances for the database session and three tables. Then, I assign the author info and quote text values to corresponding table columns.
Next, we need to check whether the author and tags of the current item already exist in the database or not and only create new author/tag if they don’t exist so far:
In the end, I add the quote to the database:
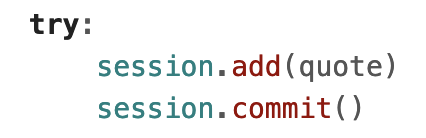
Note that you don’t need to add author and tag explicitly due to the relationships you specified in ORM (quote.author and quote.tags) — the new author/tags (if any) will be created and inserted automatically by SQLAlchemy.
Now, run the spider scrapy crawl quotes, you should see a SQLite file named scrapy_quotes.db created. You can open the file to see the extracted content using SQLite command line:
$ sqlite3 scrapy_quotes.db
...
sqlite> .tables
author     quote      quote_tag  tag
sqlite> select * from quote limit 3;
1|The world as we have created it is a process of our thinking. It cannot be changed without changing our thinking.|1
2|Imperfection is beauty, madness is genius and it's better to be absolutely ridiculous than absolutely boring.|2
3|The person, be it gentleman or lady, who has not pleasure in a good novel, must be intolerably stupid.|3
sqlite> .quit
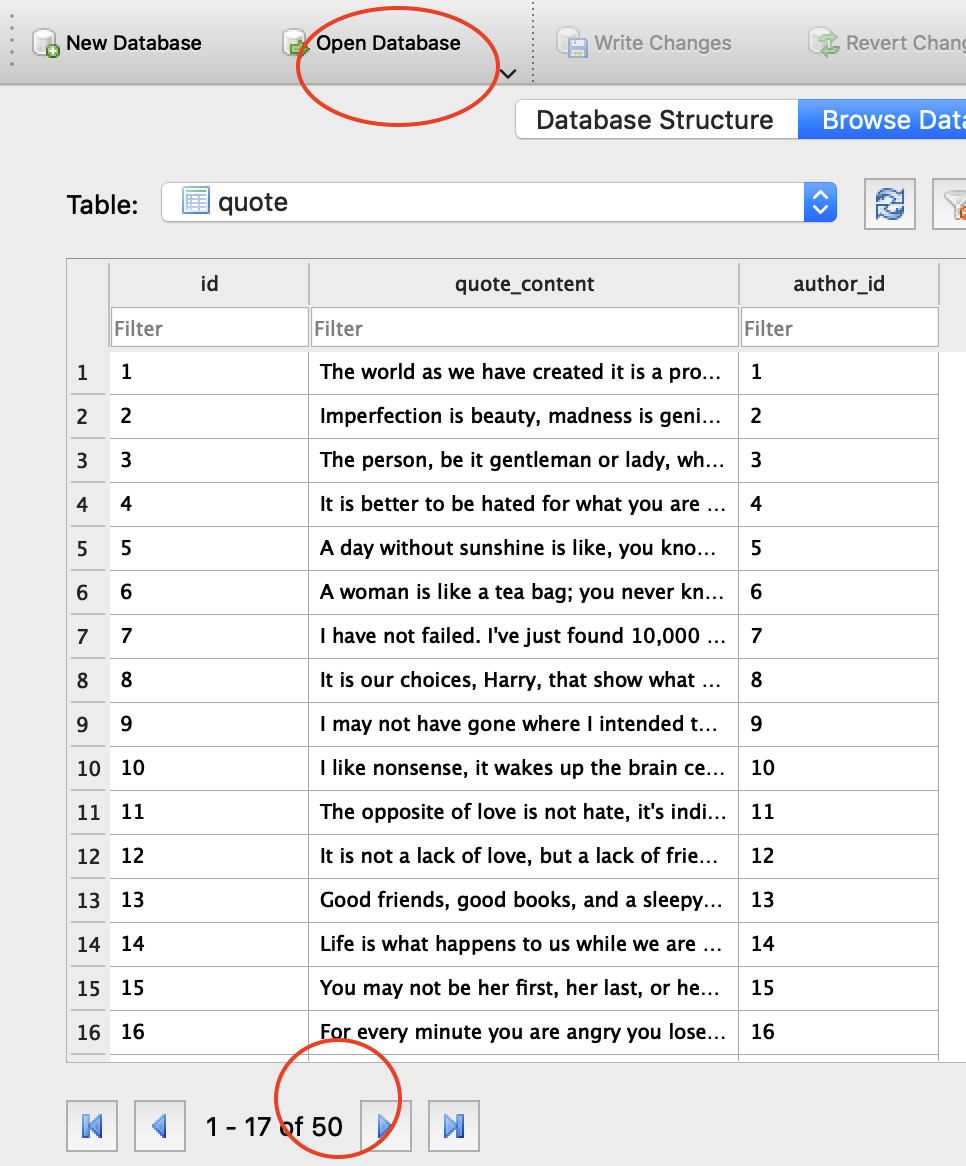
Note, that we have 50 quotes extracted. Assume the website may add additional quotes and you would like to run the spider once a week to collect the new ones if any. So, let’s run the spider scrapy crawl quotes again and you may notice a problem: we now have 100 quotes in the database — the same 50 quotes are extracted and stored again!
Next, let’s add another pipeline to check the item to see whether the item is a duplicate, if yes, drop the item so that the item won’t go through the rest of the pipelines.
Open pipelines.py file and add the following class (pipeline):
class DuplicatesPipeline(object):

    def __init__(self):
        """
        Initializes database connection and sessionmaker.
        Creates tables.
        """
        engine = db_connect()
        create_table(engine)
        self.Session = sessionmaker(bind=engine)
        logging.info("****DuplicatesPipeline: database connected****")

    def process_item(self, item, spider):
        session = self.Session()
        exist_quote = session.query(Quote).filter_by(quote_content = item["quote_content"]).first()
        session.close()
        if exist_quote is not None:  # the current quote exists
            raise DropItem("Duplicate item found: %s" % item["quote_content"])
        else:
            return item
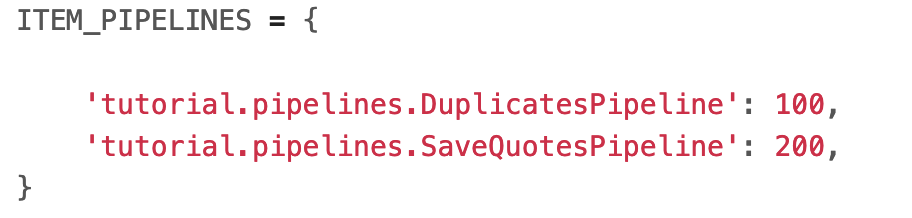
Make sure to import the DropItem exception: from scrapy.exceptions import DropItem. The logic is simple: do a database query to see whether the current item’s quote text already exists, if yes, drop the item. Now, you need to enable this pipeline in settings.py and make sure the duplicates pipeline is executed before the save to database pipeline:
You can delete the SQLite file first and run the spider a few times, you will see that only the first time the database is populated with 50 quotes. After that, you can see the warning information indicating the duplicate items have been dropped.
2019-09-12 11:16:04 [scrapy.core.scraper] WARNING: Dropped: Duplicate item found
...
2019-09-12 11:16:04 [scrapy.core.engine] INFO: Closing spider (finished)
2019-09-12 11:16:04 [scrapy.statscollectors] INFO: Dumping Scrapy stats:
...
'item_dropped_count': 50,
'item_dropped_reasons_count/DropItem': 50,
...
You have finished Part III!! Cheers. In Part IV, I will show you how to deploy the spider to do periodic crawling and monitoring, e.g., run the spider automatically every 10 minutes.
Part IV
In the previous three parts, you have developed a spider that extracts quote information from http://quotes.toscrape.comand stores the data into a local SQLite database. In this part, I will show you how to deploy the spider to the cloud.
First, let’s see how you can deploy to https://scrapinghub.com — the commercial service ran by the team behind the open-source Scrapy framework.
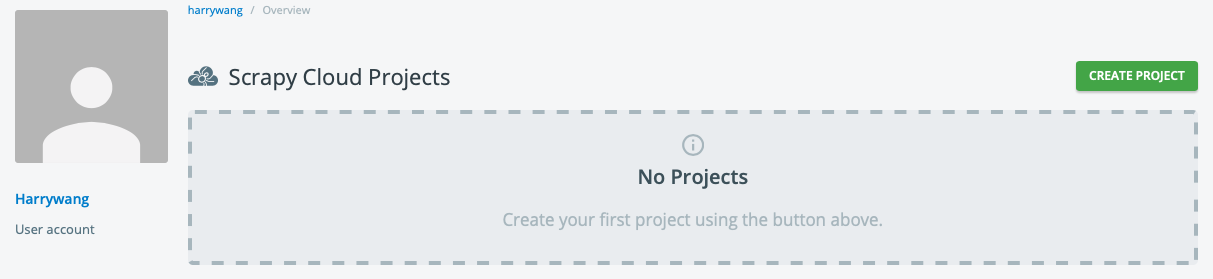
Create a free account and a new project:
Then, click Code and Deploys menu and install shub by following the instructions shown on your screen — record your API key and deployment number.
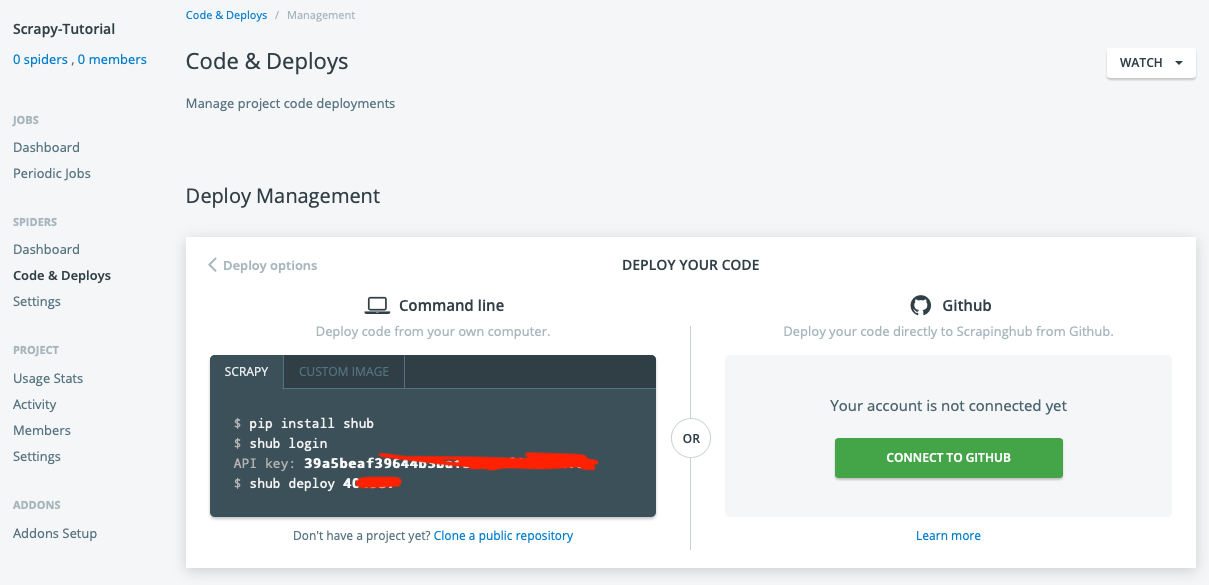
Go back to the root of scrapy-tutorial (the root of the Scrapy project) and use commands shub login and shub deploy to deploy your project to Scrapyinghub:
(venv) dami:scrapy-tutorial harrywang$ shub login
Enter your API key from https://app.scrapinghub.com/account/apikey
API key: xxxxx
Validating API key...
API key is OK, you are logged in now.
(venv) dami:scrapy-tutorial harrywang$ shub deploy 404937
Messagepack is not available, please ensure that msgpack-python library is properly installed.
Saving project 404937 as default target. You can deploy to it via 'shub deploy' from now on
Saved to /Users/harrywang/xxx/scrapy-tutorial/scrapinghub.yml.
Packing version b6ac860-master
Created setup.py at /Users/harrywang/xxx/scrapy-tutorial
Deploying to Scrapy Cloud project "404937"
{"status": "ok", "project": 4xxx, "version": "b6ac860-master", "spiders": 3}
Run your spiders at: https://app.scrapinghub.com/p/404937/
Scrapinghub configuration file scrapinghub.yml is created in the root folder and you need to edit it to specify our specific package requirements. Otherwise, a default setting would be used instead:
- scrapy 1.7 running Python 3
- requirements files for other packages
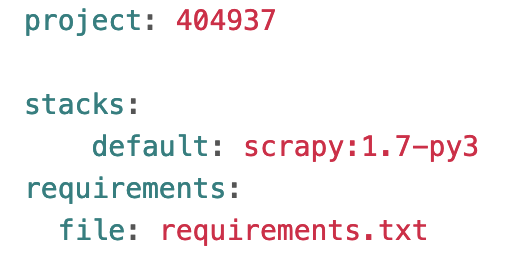
run shub deploy to deploy again for the new configuration to take effect.
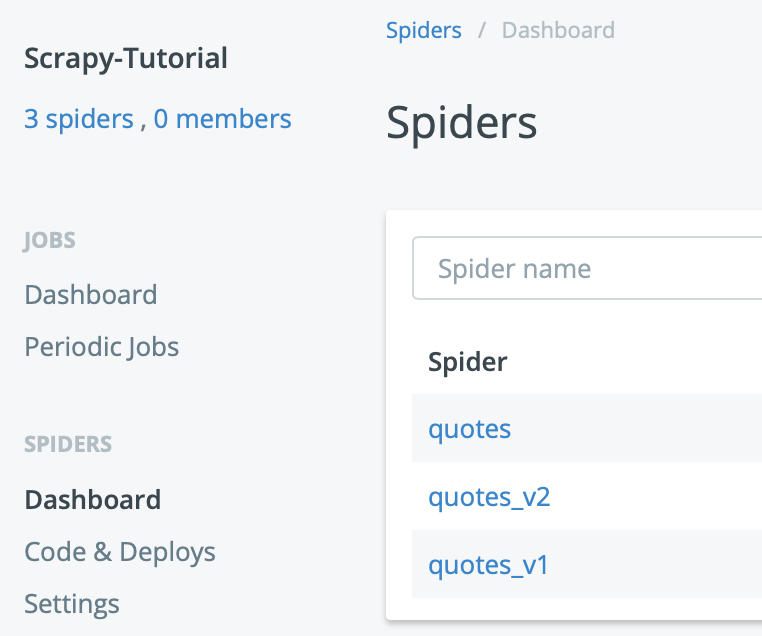
Given that I have 3 spiders in the repo (quotes_spider_v1.py and quotes_spider_v2.py are the intermediate spiders for demonstration purpose), you should see 3 spiders in the deployed project (quotes_spider.py is the main spider):
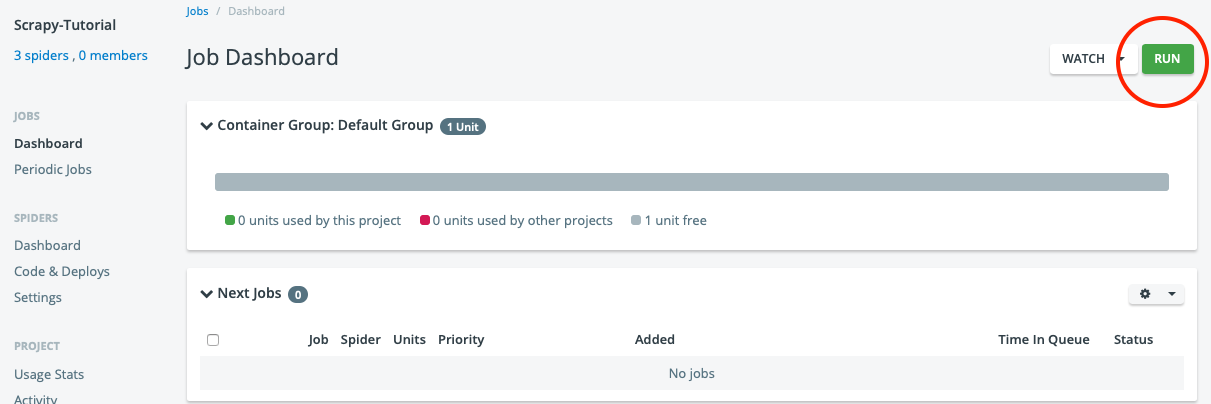
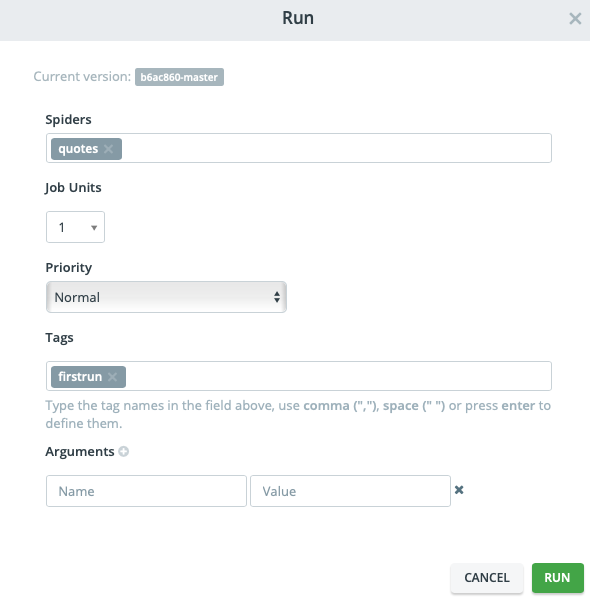
Now, you can run your spider:
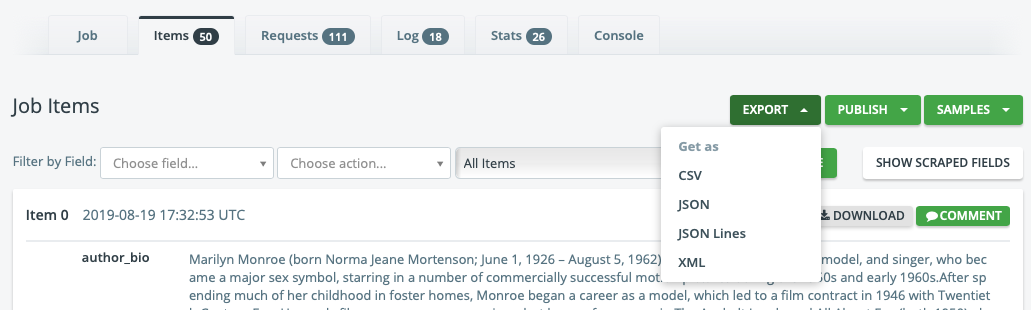
Once the job is complete, you can check the results and download the items in different formats:
However, you have to paid to run periodic jobs, e.g., running your spider at 8 am every Tuesday.

In search of free options for running periodic crawling jobs, I ran into the great open source project ScrapydWeb — many thanks to the author for developing such a nice project with great features and documentations. Next, I will walk you through the process of setting up your own “ScrapingHub.com” using ScrapydWeb using Heroku (You can also follow the author’s documentation).
The following figure shows the architecture of ScrapydWeb, which is designed to support distributed crawling.
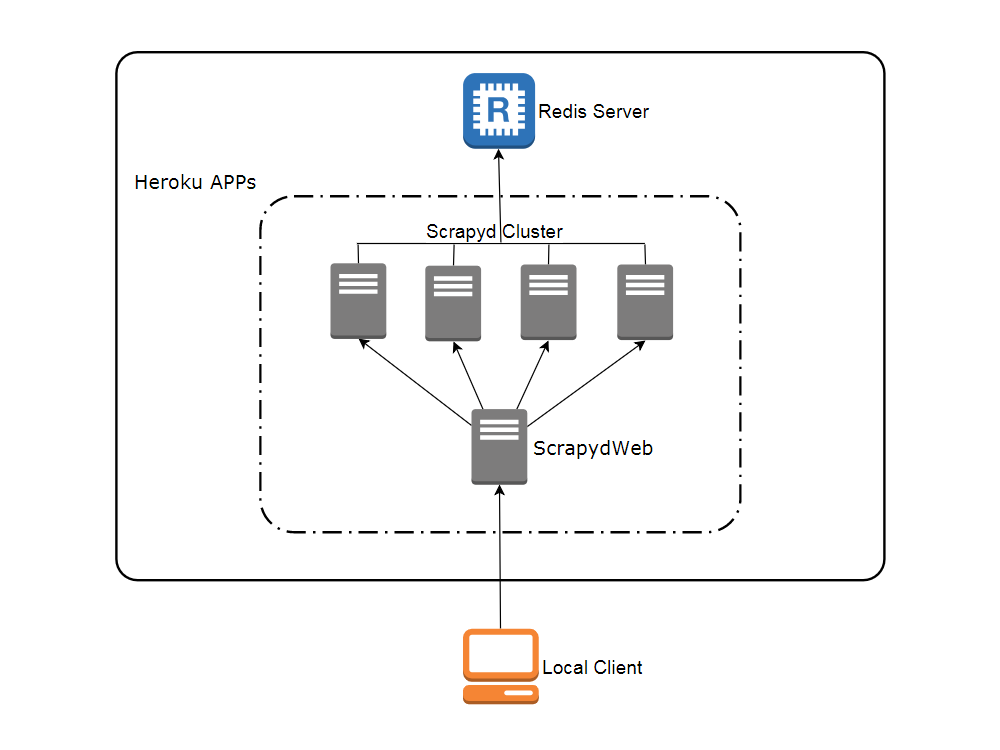
In this tutorial, I do not cover distributed crawling. Instead, I will set up only two servers: a ScrapydWeb server (this server provides the web UI to manage different spiders and jobs) and one Scrapyd server (this server hosts your spider code and actually sends/receives requests/responses).
The author of ScrapydWeb makes this deployment process very simple by pre-configuring Heroku at his repo at ttps://github.com/my8100/scrapyd-cluster-on-heroku.
- scrapyd-cluster-on-heroku/scrapydweb: this folder has the Heroku configurations for the ScrapydWeb server
- scrapyd-cluster-on-heroku/scrapyd: this folder has the Heroku configurations for the Scrapyd server
We need a custom deployment because our scrapy project has specific package requirements, e.g., SQLAlchemy, MySQL, Python 3.x, etc. Therefore, you need to fork a copy of https://github.com/my8100/scrapyd-cluster-on-heroku to your github account, e.g., https://github.com/harrywang/scrapyd-cluster-on-heroku and make some changes to support this tutorial.
You can view the changes I made to the author’s repo at https://github.com/harrywang/scrapyd-cluster-on-heroku/commit/e612dcb9a6c158da4b744d311e82c529497fba7c, which include:
- add MySQL and SQLAlchem packages in scrapyd/requirements.txt
- change python version to python-3.6.8 in scrapyd/runtime.txt
- turn on Scrapy web server authentication and set user name and password in scrapydweb/scrapydweb_settings_v10.py (you should not make your username and password public like this)
Next, create a free account at heroku.com and install Heroku CLI: brew tap heroku/brew && brew install heroku
Then, clone the repo:
git clone https://github.com/harrywang/scrapyd-cluster-on-heroku
cd scrapyd-cluster-on-heroku/
Login to Heroku:
scrapyd-cluster-on-heroku harrywang$ heroku login
heroku: Press any key to open up the browser to login or q to exit:
Opening browser to https://cli-auth.heroku.com/auth/browser/3ba7221b-9c2a-4355-ab3b-d2csda
Logging in… done
Logged in as xxx@gmail.com
Deploy Scrapyd server/app:
- go to /scrapyd folder first and make this folder a git repo by running the following git commands:
git init
git status
git add .
git commit -a -m "first commit"
git status
- create a new app named scrapy-server1 (choose another one if this one is taken)
- set a git remote named heroku
- check git remotes
- push the contents in /scrapyd folder to the remote to deploy the app
$ pwd
/Users/harrywang/xxx/scrapyd-cluster-on-heroku/scrapyd
$ heroku apps:create scrapy-server1
$ heroku git:remote -a scrapy-server1
set git remote heroku to https://git.heroku.com/scrapy-server1.git
$ git remote -v
heroku https://git.heroku.com/scrapy-server1.git (fetch)
heroku https://git.heroku.com/scrapy-server1.git (push)
origin https://github.com/harrywang/scrapyd-cluster-on-heroku (fetch)
origin https://github.com/harrywang/scrapyd-cluster-on-heroku (push)
$ git push heroku master
You can set environment variables for the remote scrapyd server, such as setting the timezone:
$ heroku config:set TZ=US/Eastern
Setting TZ and restarting ⬢ scrapy-server1... done, v4
TZ: US/Eastern
Now, you have a scrapyd server running at http://scrapy-server1.herokuapp.com
Next, let’s set up the web app that provides the UI for us to add scrapyd server, upload scrapy projects, and schedule crawling jobs.
Similarly, let’s deploy ScrapydWeb server/app:
- go to /scrapydweb folder first and make this folder a git repo by running the following git commands:
git init
git status
git add .
git commit -a -m "first commit"
git status
- create a new app named scrapyd-web
- set a git remote named heroku
- check git remotes
- push the contents in /scrapydweb folder to the remote to deploy the app
- set the timezone
$ pwd
/Users/harrywang/xxx/scrapyd-cluster-on-heroku/scrapydweb
$ heroku apps:create scrapyd-web
$ heroku git:remote -a scrapyd-web
set git remote heroku to https://git.heroku.com/scrapyd-web.git
$ git remote -v
$ git push heroku master
$ heroku config:set TZ=US/Eastern
Setting TZ and restarting ⬢ scrapyd-web... done, v6
TZ: US/Eastern
You need to add at least one Scrapyd server to the web server (let’s add the one you just set up above scrapy-server1.herokuapp.com). You can add more scrapyd servers for distributed crawling in a similar manner:
$ heroku config:set SCRAPYD_SERVER_1=scrapy-server1.herokuapp.com:80
Setting SCRAPYD_SERVER_1 and restarting ⬢ scrapyd-web... done, v6
SCRAPYD_SERVER_1: scrapy-server1.herokuapp.com:80
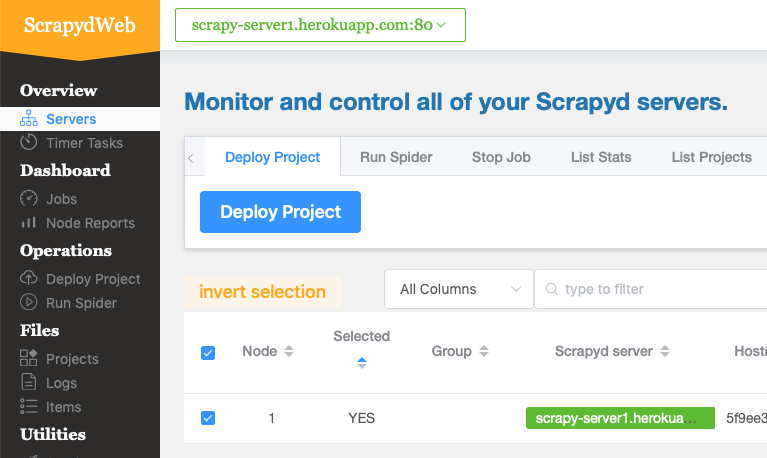
Now, you have the scrapyd web server running at http://scrapyd-web.herokuapp.com. Open the address in a browser and use the username and password you specified in scrapydweb/scrapydweb_settings_v10.py file to log in and you should see the management UI of the web server:
The last task is to deploy our scrapy project using scrapyd-client.
Go to our scrapy project repo:
$ pwd
/Users/harrywang/xxx/scrapy-tutorial
Use pip install git+https://github.com/scrapy/scrapyd-client to install scrapyd-client. Open scrapy.cfg file and change its content to add the deployment configuration as follows:
[settings]
default = tutorial.settings
[deploy]
url = http://scrapy-server1.herokuapp.com
username = admin
password = scrapydweb
project = scrapy-tutorial
Then, use scrapyd-deploy to package and deploy our project to the scrapyd server:
$ scrapyd-deploy
/Users/harrywang/xxx/scrapy-tutorial/venv/lib/python3.6/site-packages/scrapyd_client/deploy.py:23: ScrapyDeprecationWarning: Module `scrapy.utils.http` is deprecated, Please import from `w3lib.http` instead.
from scrapy.utils.http import basic_auth_header
Packing version 1568331034
Deploying to project "scrapy-tutorial" in http://scrapy-server1.herokuapp.com/addversion.json
Server response (200):
{"node_name": "5f9ee34d-f6c8-4d80-ac05-3657c4920124", "status": "ok", "project": "scrapy-tutorial", "version": "1568331034", "spiders": 3}
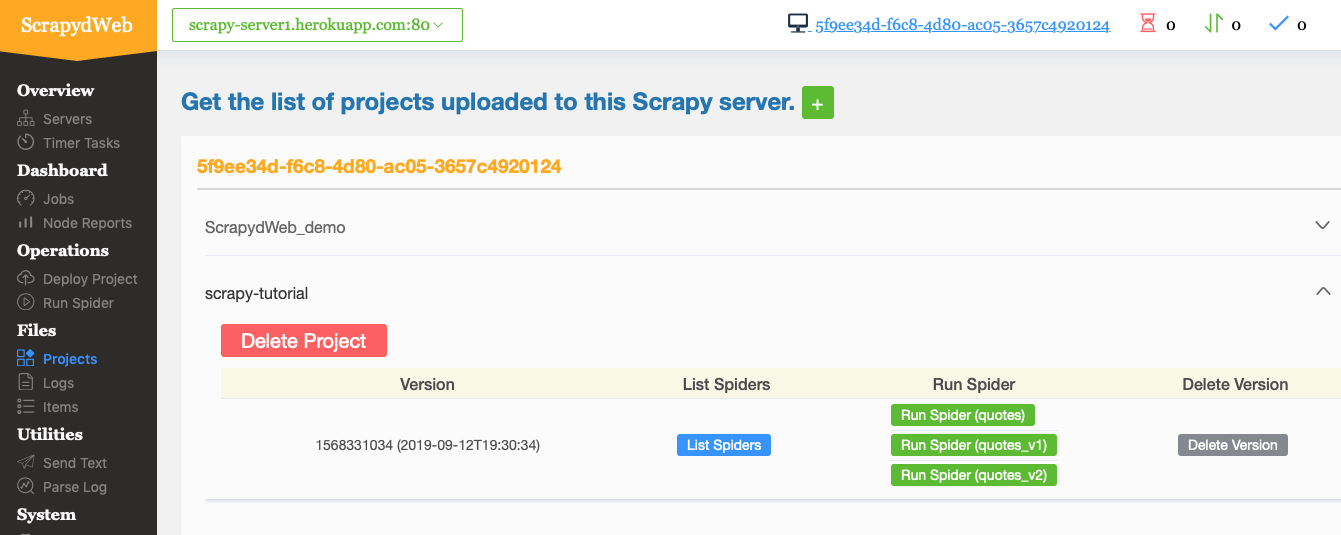
Open http://scrapyd-web.herokuapp.com/1/projects/ in the browser, you should see the project successfully deployed:
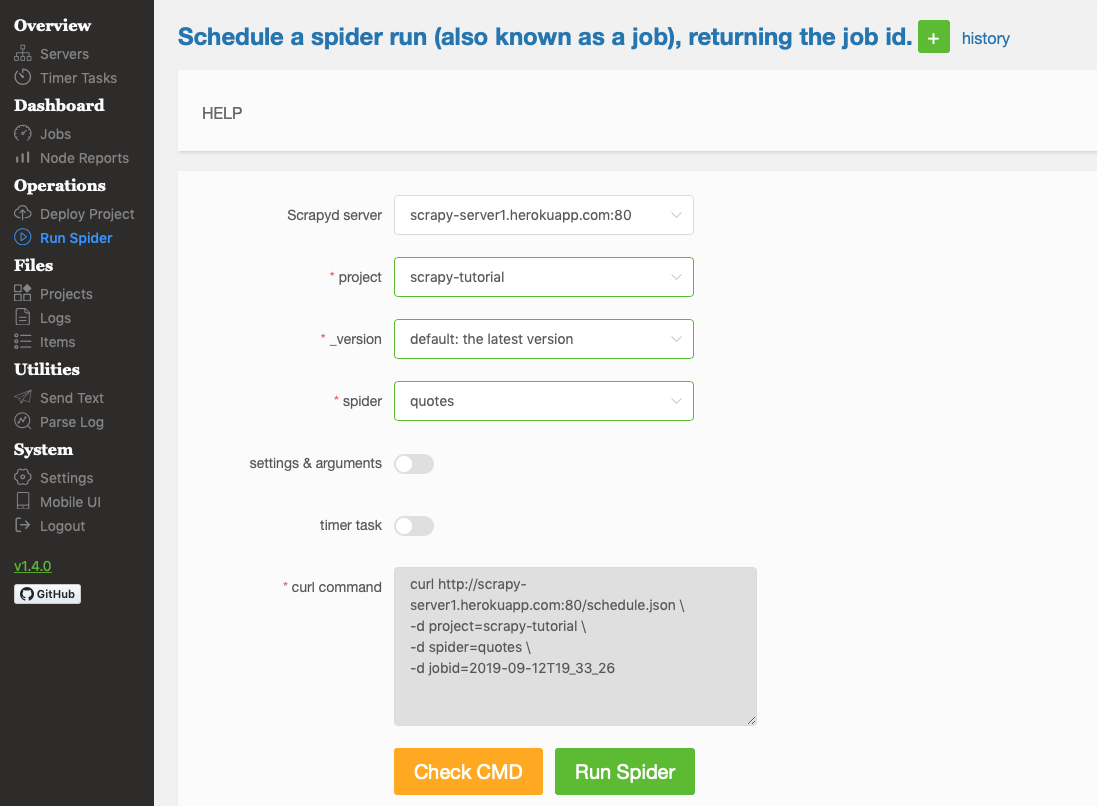
Click the menu “Run Spider”, you can run the “quotes” spider:
You then can check the results in the “Jobs” menu and download the items in the “Items” menu — you can try other menus to see stats, errors, etc.:

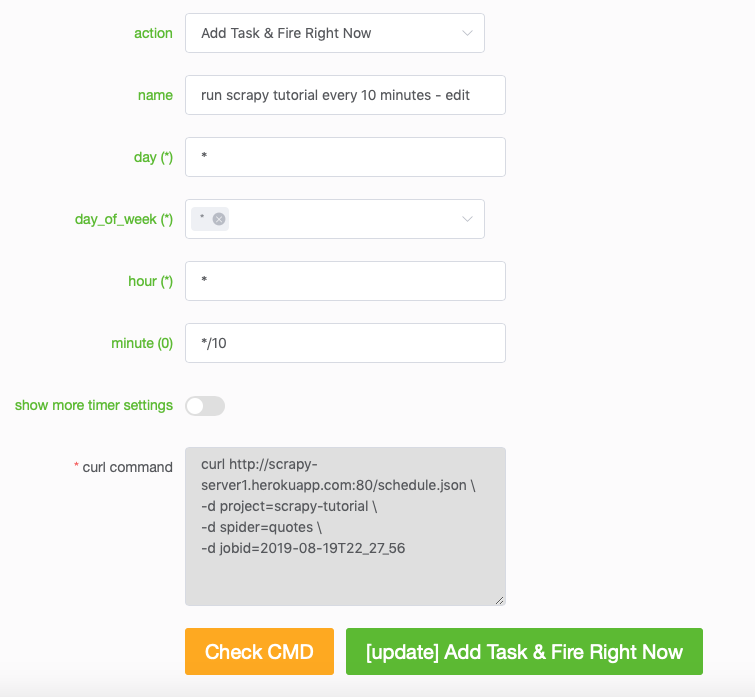
The last task is to specify a timed task, such as running the quotes spider every 10 minutes automatically: Click “Timer Tasks” and the following screenshot shows a task that runs every 10 minutes — the feature of Timer Task is based on an Advanced Python Scheduler library named APScheduler, see this part of the document to figure out how to set different values for the timer.
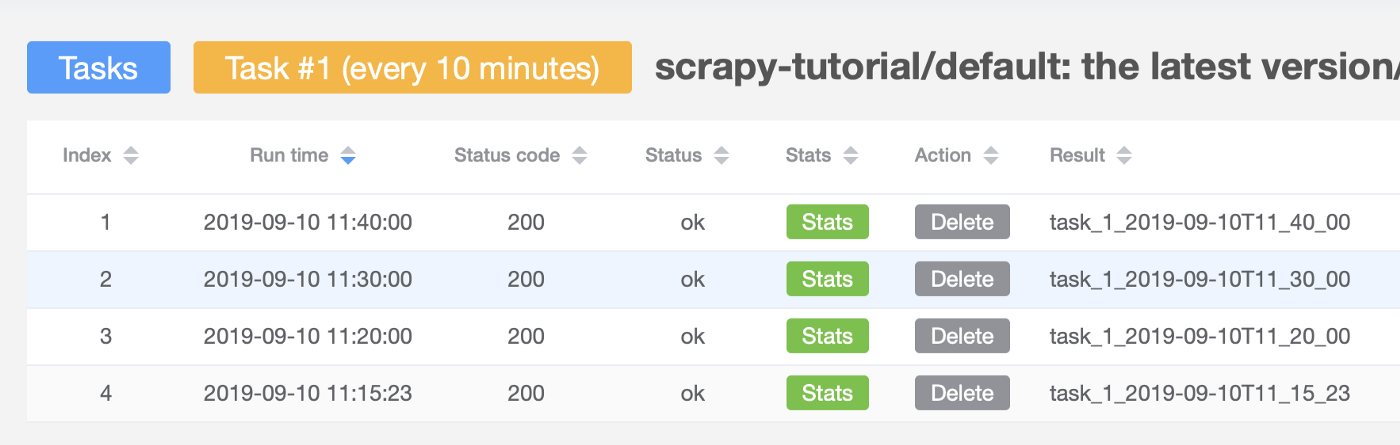
Then, you can check the Task Results:

The following shows that the timer task has been fired 4 times:
NOTE that we should not use the local SQLite database when deploying our project to the server. Instead, we should save to a remote database such as MySQL server — you only need to change the CONNECTION_STRING variable as we discussed in Part III.
Big congratulations! You have finished this tutorial and I hope you enjoyed the learning. As a bonus, I also created a separate repo (Scrapy + Selenium) to show how to crawl dynamic web pages (such as a page that loads additional content via scrolling) and how to use proxy networks (ProxyMesh) to avoid getting banned, read this in Part V.
Part V
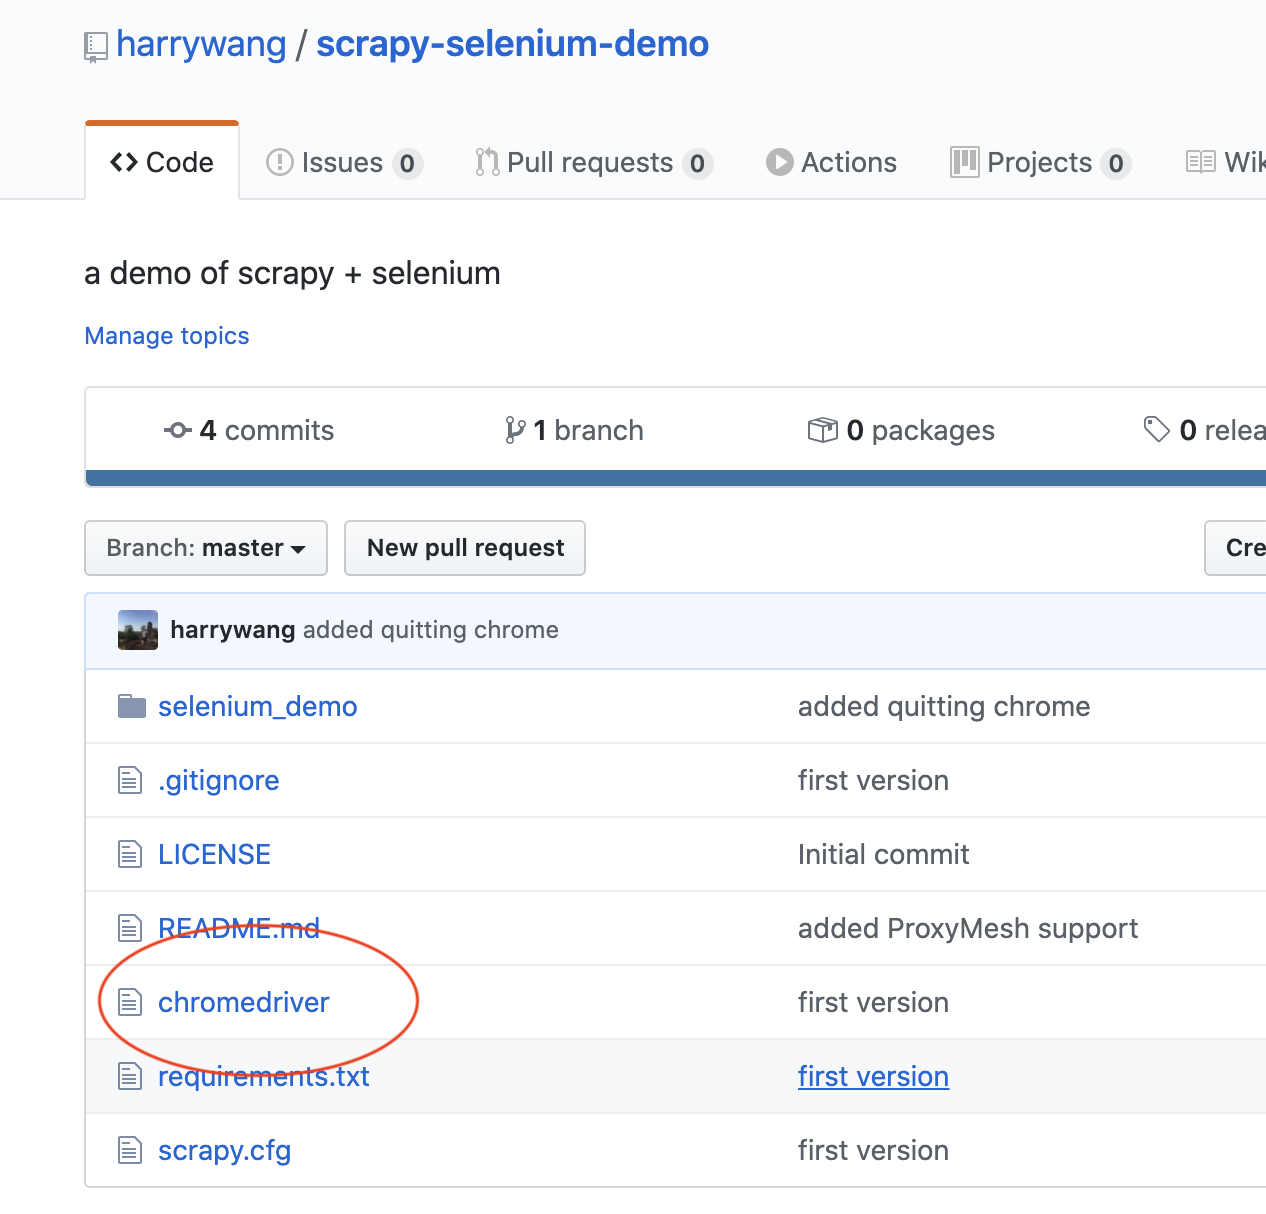
In this last part of this tutorial series, I am going to briefly cover a very important topic: dynamic scraping. The example code can be found in this repo.
In real web scraping projects, you often cannot directly crawl the websites using the approach presented in the first four parts of this tutorial for various reasons, such as the web page is dynamically generated (such as the example in this tutorial, where the web page is loaded when a user scrolls to the bottom of the current page), you need to login first via a dynamic login form, etc. In this situation, one option is to use Selenium https://www.selenium.dev/ to simulate real user actions via controlling the browser to get the data.
The webpage we are going to crawl is https://dribbble.com/designers, which is an infinite scroll page — more page contents show up when you scroll to the bottom of the page. Selenium enables us to control a browser using code and we use Chrome in this example. Also, make sure you install Selenium and Scrapy as shown in the requirements.txt file.
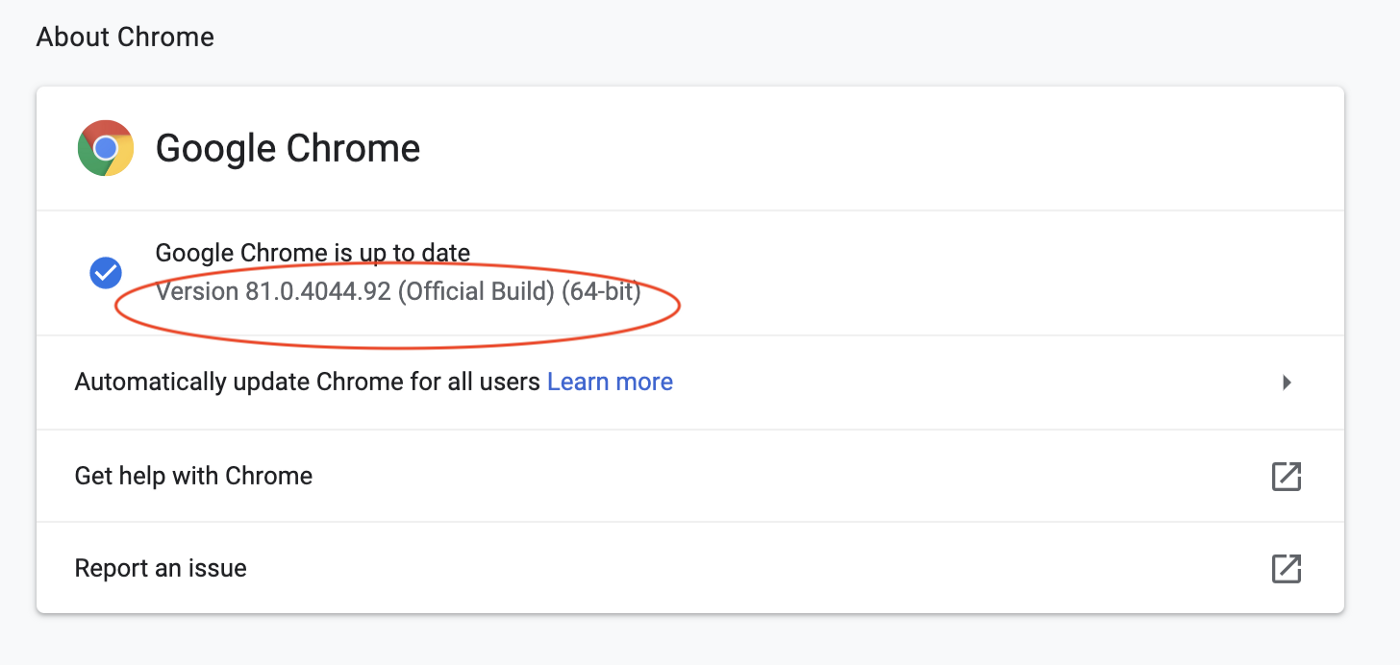
First, you need to install Chrome on the machine you are going to run the scraping code and download the Chrome driver file from https://chromedriver.chromium.org/downloads for Selenium. Make sure the driver version matches the installed Chrome version (check it from Menu → Chrome → About Google Chrome):
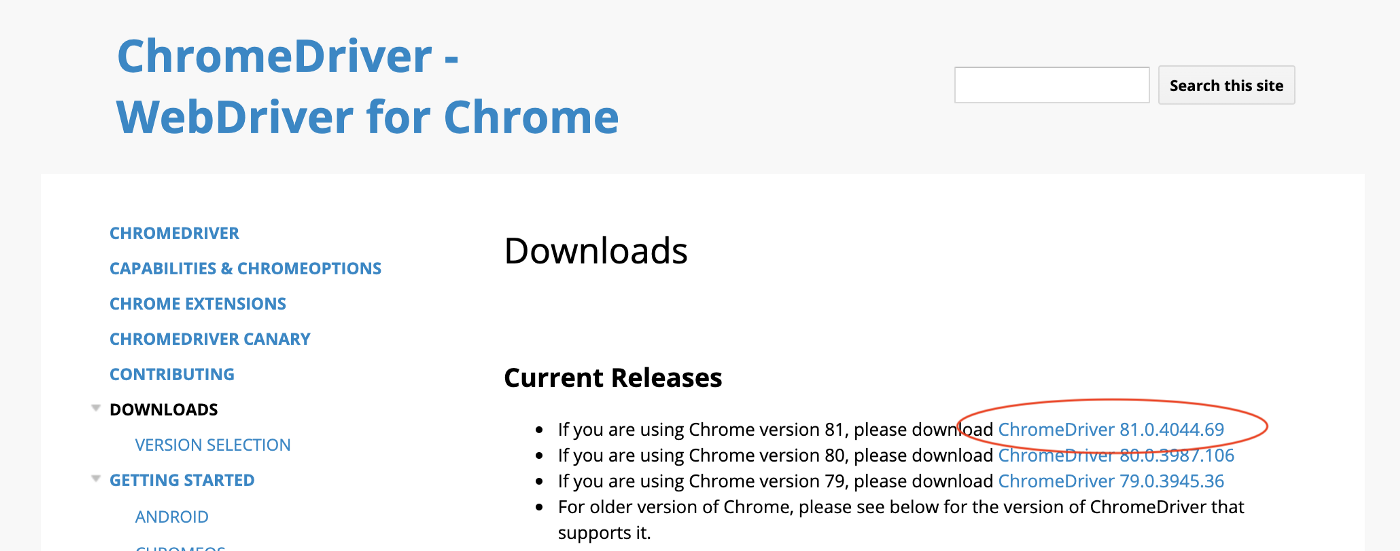
You have to replace the Chrome Driver file in the repo with the correct version for the code to work!!
Given the code is quite simple, I won’t go into the details and only explain the key ideas. In the spider file:
- I first use last_height = driver.execute_script(“return document.body.scrollHeight”) to get the current height of the page
- then I use driver.execute_script(“window.scrollTo(0, document.body.scrollHeight);”) to scroll to the bottom of the page and get the currently loaded page content
- pause 5 seconds, and repeat this — each time, more page contents are collected — till I cannot scroll anymore or reach the predefined maximal number of scrolls (10 in this case) I also included a small example to show how you can automatically find the search box, enter “New York”, and click the search button (pause 1 second between actions):
search_location = driver.find_element_by_css_selector('#location-selectized').send_keys('New York')
sleep(1)
search_button = driver.find_element_by_css_selector('input[type="submit"]')        search_button.click()
sleep(5)
Now, when you run scrapy crawl dribbble, an instance of Chrome will be started and you can see the scrolling to the bottom of the page and the search actions I just mentioned — all fully automated :). The extracted data is logged to the console.
In the repo, I also included the code to show how you can use a Proxy service “ProxyMesh” to rotate your IP addresses to avoid the potential banning from the website — you should never aggressively crawl any website, which is essentially a sort of denial-of-service (DOS) attack.
For ProxyMesh, you need to sign up for an account and then you can get a proxy server address such as http://harrywang:mypassword@us-wa.proxymesh.com:31280 and you need to set the local http_proxy environment variable: export http_proxy=http://harrywang:mypassword@us-wa.proxymesh.com:31280 then activate the HttpProxyMiddleware by uncommenting the following part in settings.py:
DOWNLOADER_MIDDLEWARES = {
    'scrapy.downloadermiddlewares.httpproxy.HttpProxyMiddleware': 100,
}
For ProxyMesh to work with Selenium, do the following two steps:
- Add the IP of the machine running the scraping code to ProxyMesh for IP authentication.
- Uncomment the following two lines in the dribbble_spider.py file:
# PROXY = "us-wa.proxymesh.com:31280"
# chrome_options.add_argument('--proxy-server=%s' % PROXY)
That’s it! Thanks for reading!