Get Test Ethers using Selenium
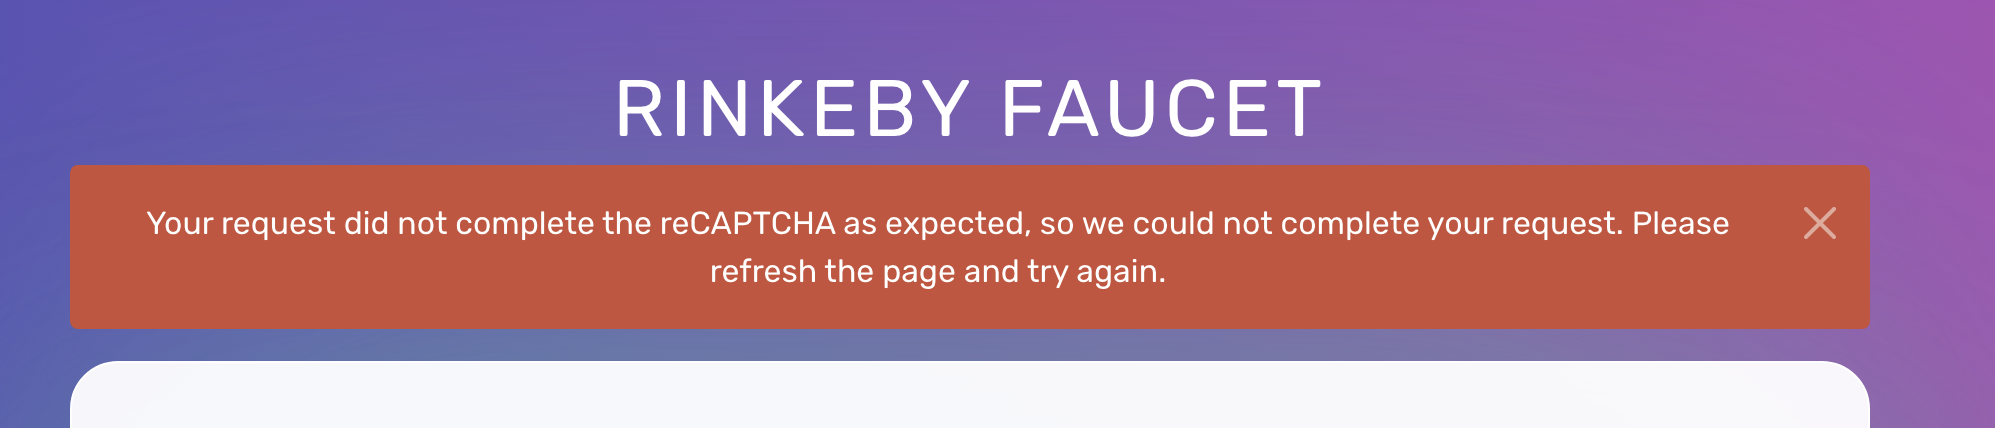
Update (3/4/2022): After the website’s recent update, the script on EC2 will be detected as a bot and then fail the reCAPTCHA test.
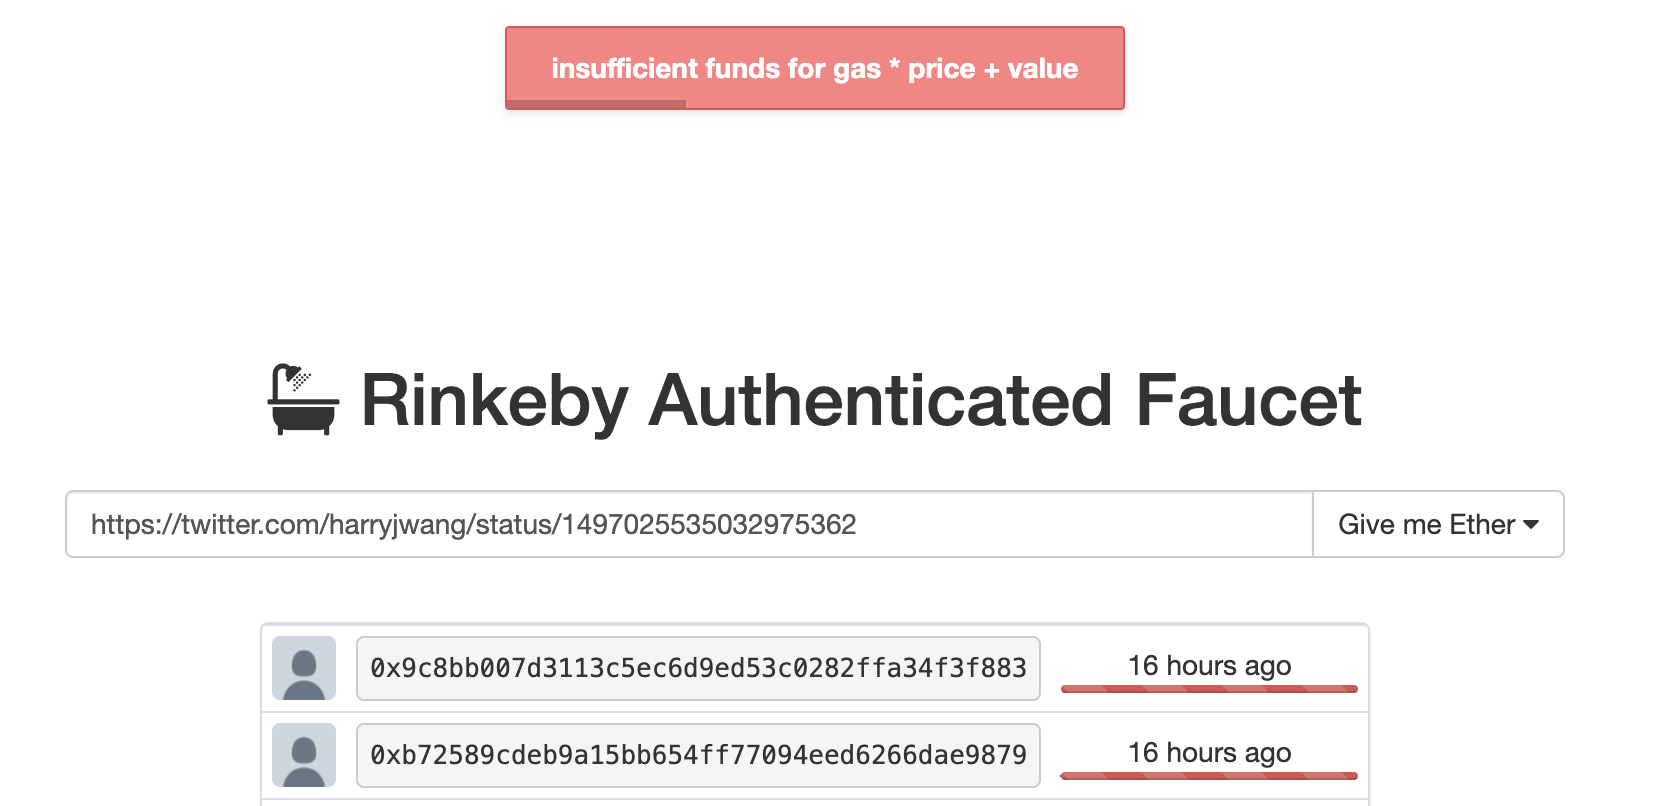
I needed some test ethers for Rinkeby and found out that the faucet is not working (I also don’t like that you have to tweet to get the ethers):
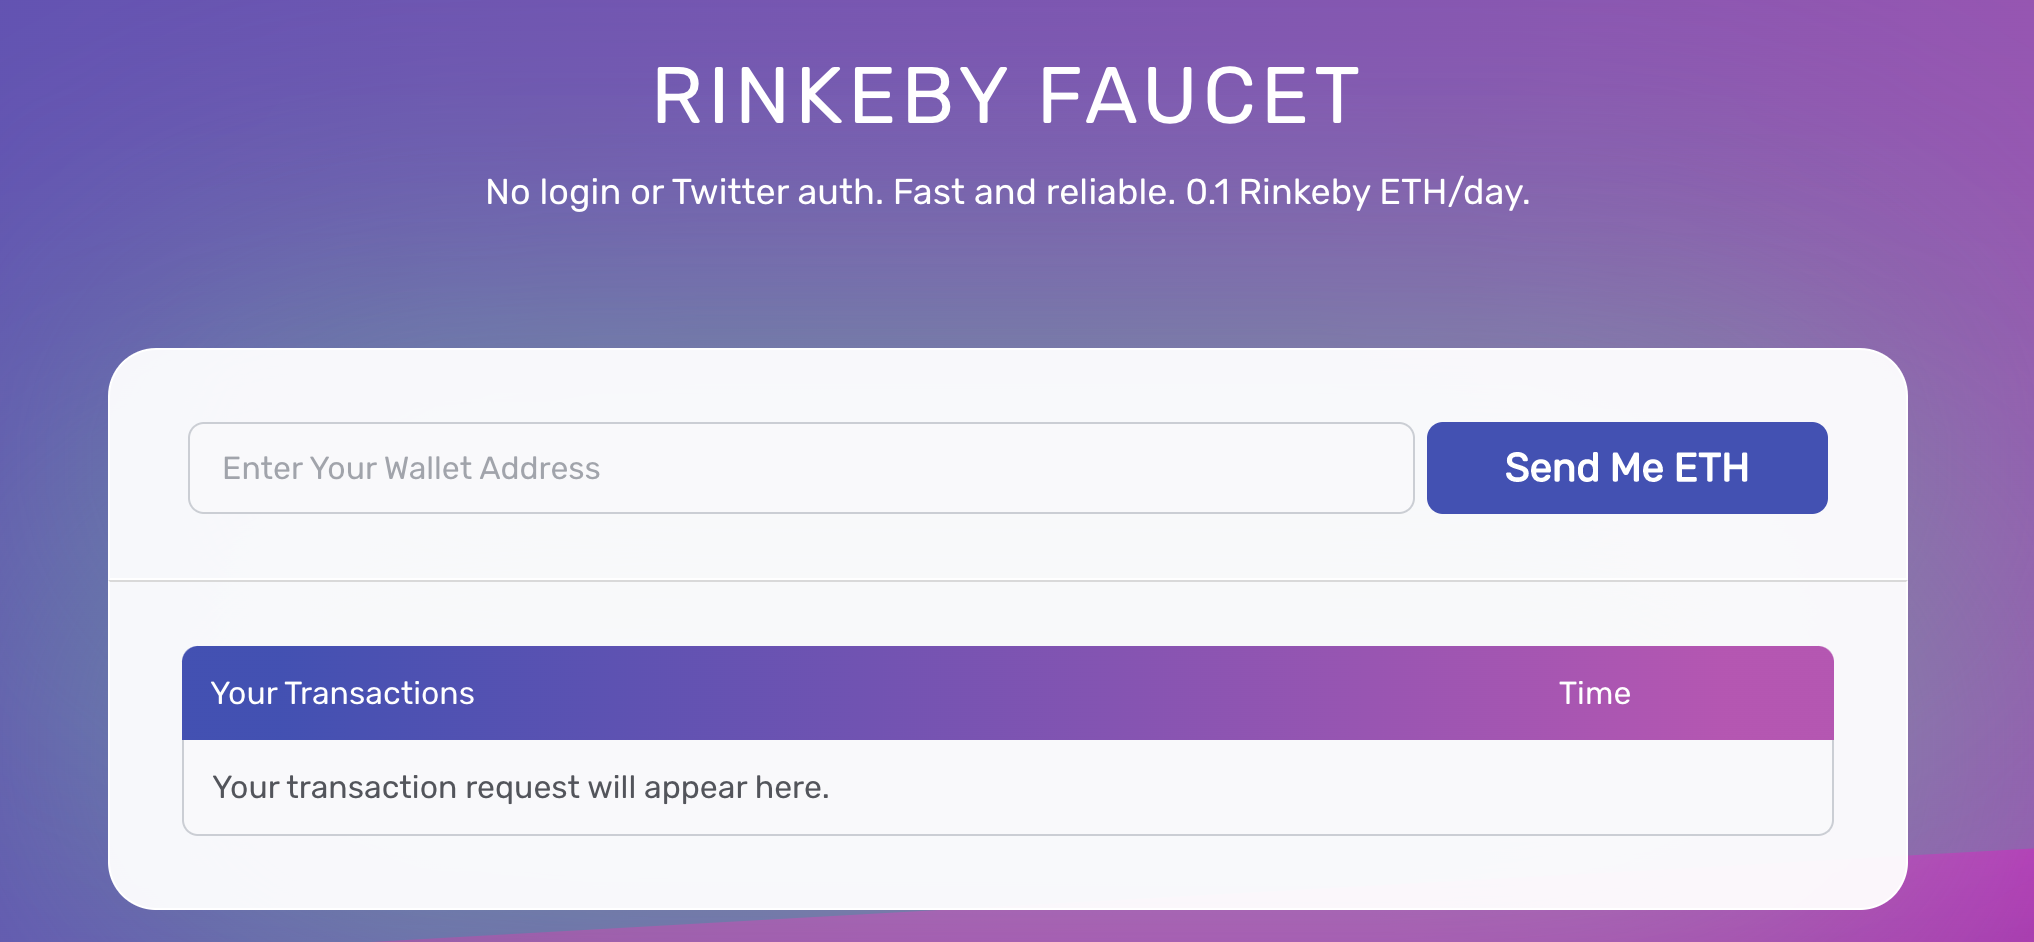
Then, I found https://www.rinkebyfaucet.com/, which gives 0.1 test ether for each address per day:
I wrote a program to control the browser (via Selenium) to get test ethers and scheduled the program to run every 24 hours using AWS EC2.
The code repo can be accessed here.
I use this program to illustrate the followings:
- Automate browsers using Selenium and avoid being detected as a bot
- Select correct Selenium Chrome driver automatically via webdriver-manager
- Use
.envto manage environment variables - Send emails using SendGrid
- Schedule scripts using
crontab - Deploy scheduled Selenium tasks on AWS EC2 instances
Local Setup
Clone the repo, go to the repo folder, setup the virtual environment, and install the required packages:
git clone https://github.com/harrywang/send-me-eth.git
cd send-me-eth
python -m venv venv
source venv/bin/activate
pip install -r requirements.txt
Register a free account at https://sendgrid.com/ and get the API key.
You then need to create a .env file in the root project folder and add the following lines (you can delete WALLET_ADDRESSES if you only use one address):
WALLET_ADDRESS='your wallet address'
WALLET_ADDRESSES='["wallet address 1", "wallet address 2", "wallet address 3"]'
SENDGRID_API_KEY='your sendgrid api key'
FROM_EMAIL='your sendgrid from email'
TO_EMAIL='the email you want to send notification to'
If you use multiple wallet addresses, change multi_addresses = False to multi_addresses = True in send-me-eth.py.
Then, run python send-me-eth.py every 24 hours to get 0.1 eth each time. Next, I explain the code and show how to deploy the script to AWS so that you don’t have to manually run this every day.
Code
Environment variables (especially sensitive information such as API tokens, passwords, etc.) should never be hardcoded in the source code. One way to manage the environment variables is to put them in a .env file and load the variables using dotenv package.
NOTE: make sure to put .env in the .gitignore file.
.envexample for simple value variable or multiple value variable
WALLET_ADDRESS='your wallet address'
WALLET_ADDRESSES='["wallet address 1", "wallet address 2", "wallet address 3"]'
- install dotenv:
pip install python-dotenv - import it:
from dotenv import load_dotenv - load environment variables (use json.loads to load multiple value variable):
import json

load_dotenv()
WALLET_ADDRESS = os.getenv('WALLET_ADDRESS')
WALLET_ADDRESSES = json.loads(os.getenv('WALLET_ADDRESSES'))
...
Setup Selenium using webdriver-manager:
- install:
pip install webdriver_manager - setup the Chrome driver with options. NOTE when running in headless mode, a reCAPTCHA check will show up and fail if our program is detected as a bot. I use the followings to avoid that:
- specify the user_agent option
- randomly pause ENOUGH time after each request/operation, such as
sleep(randint(5, 15))pauses random 5-15 seconds
driver.get_screenshot_as_file("screenshot.png")can be used to take screenshots to help with debugging. You can use the following command to get the screenshot files from EC2 to your local computer:
scp -i "aws-gmail.cer" ubuntu@ec2-54-227-212-97.compute-1.amazonaws.com:/home/ubuntu/send-me-eth/screenshot.png .
- You can comment out all headless options (all lines start with
op.add_argument) when testing locally so that a chrome browser can pop up.
s = Service(ChromeDriverManager().install())
op = webdriver.ChromeOptions()
op.add_argument('--headless')  # set headless mode - the browser won't show
op.add_argument('--window-size=1920,1080')  # set the browser size
user_agent = 'Mozilla/5.0 (X11; Linux x86_64) AppleWebKit/537.36 (KHTML, like Gecko) Chrome/60.0.3112.50 Safari/537.36'
op.add_argument(f'user-agent={user_agent}')
driver = webdriver.Chrome(service=s, options=op)
The rest of the code is very straightforward:
- load the website via Selenium
- find the textbox and enter the address
- find the button and click
- pause some seconds to repeat with another address
- send an email to notify the completion of the script
Schedule the task using cron
Cron (the word “Cron” comes from the Greek word “Chronos”, which means time) is a job scheduler on Unix-like operating systems to schedule jobs to run periodically at fixed times, dates, or intervals.
crontab (stands for “cron table”) command can be used to schedule the task. A cron schedule expression has five fields: minute, hour, day of month, month, day of week
You can use https://crontab.guru/ to help edit the expression. For example:
*/1 * * * *means running the task every minute5 */24 * * *means running the task at minute 5 past every 24th hour.
Run crontab -e to add the following line to the file (I choose vim as the editor), save the file (press ESC, then type :wq) and you have scheduled a task.
*/1 * * * * python /full-path-to-the-file/send-me-eth.py
Use crontab -l to check the running task and you should get an email every minute as a test. To stop the task, you just need to run crontab -e again to delete the line corresponding to the task.
Deploy to AWS EC2
Create an AWS EC2 Ubuntu instance here:
- Ubuntu 20.04 (x86)
- t2.micro (free tier)
- security group with SSH port 22 inbound enabled - outbound default all open
- create a new RSA key pair and download the
.cerfile
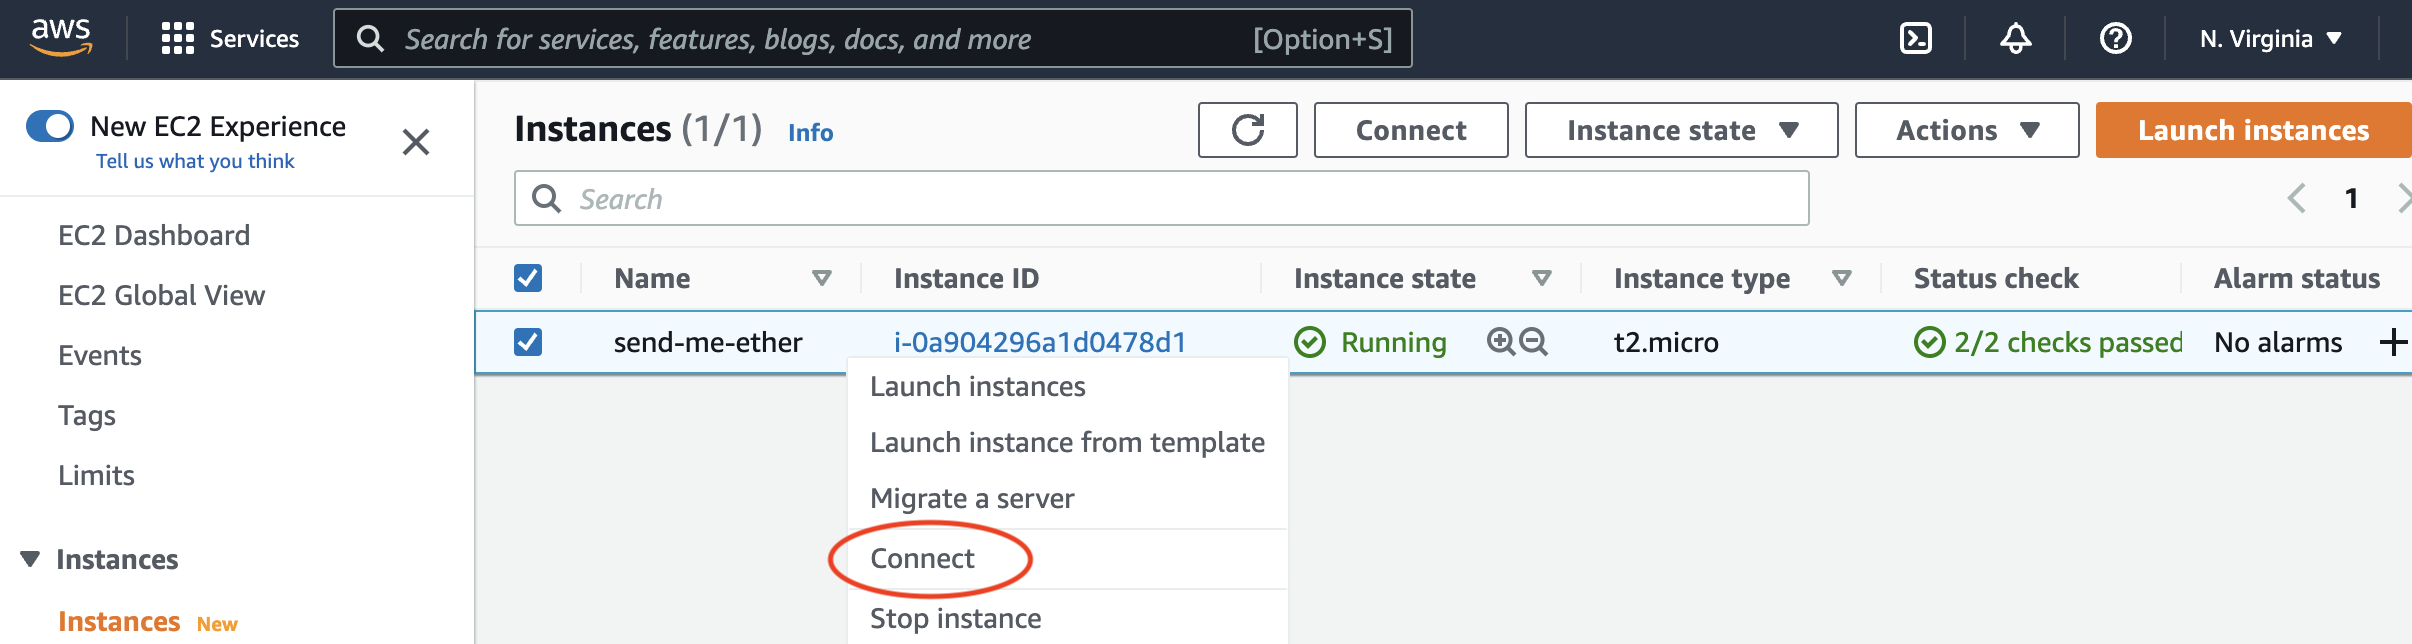
Once the instance is running, right-click the instance to get the server address:
On the local computer, switch to the folder where the .cer key file is saved and connect to the server:
chmod 400 aws-gmail.cer
ssh -i "aws-gmail.cer" ubuntu@ec2-54-227-212-97.compute-1.amazonaws.com
Once logged in, clone the repo from the remote Ubuntu prompt:
git clone https://github.com/harrywang/send-me-eth.git
cd send-me-eth/
Then create a .env file and enter the environment variables (see above)
vim .env # create .env file
Install/upgrade required packages (Python 3.8.10 is the default):
python3 --version
sudo apt update
sudo apt install python3-pip
pip3 install -r requirements.txt
pip3 install --upgrade requests
Install Chrome:
sudo apt install wget
wget https://dl.google.com/linux/direct/google-chrome-stable_current_amd64.deb
sudo dpkg -i google-chrome-stable_current_amd64.deb
sudo apt-get install -f  # run this if run into problem installing chrome
sudo dpkg -i google-chrome-stable_current_amd64.deb
Install Firefox:
sudo apt update
sudo apt install firefox
Now, you can test the script by running python3 send-me-eth-firefox.py - you should receive an email.
Next, use crontab to schedule the task as described above.
Check the paths of the default python and the script:
which python3
/usr/bin/python3
pwd
/home/ubuntu/send-me-eth
run crontab -e to add the following line to the file:
*/1 * * * * /usr/bin/python3 /home/ubuntu/send-me-eth/send-me-eth.py
Use crontab -l to check the running task:
$ crontab -l
*/1 * * * * /usr/bin/python3 /home/ubuntu/send-me-eth/send-me-eth.py
You should get an email every minute as a test.
Finally, you can change the task to run at minute 30 past every 24th hour (given the random pauses, add 30 minutes to make sure full 24 hours has passed since previous run):
30 */24 * * * /usr/bin/python3 /home/ubuntu/send-me-eth/send-me-eth.py
Now, you can close the terminal and automatically get 0.1 ether (or more if multiple addresses are used) every day :). Make sure to delete the cron task when you get enough test ethers.